
If you’ve ever wanted to dip your toes into quilting without committing to a full-sized project, this Modern Mini Quilt Tutorial is the perfect place to start. Whether you’re new to sewing or an experienced quilter looking for a quick and creative outlet, mini quilts offer a fantastic way to explore modern design, color play, and new techniques. In this guide, you’ll learn how to design, piece, quilt, and finish a modern mini quilt from scratch, using methods that are both approachable and beginner-friendly.
The beauty of a modern mini quilt lies in its simplicity, flexibility, and artistic freedom. Unlike traditional full-size quilts that require a large workspace and time commitment, a mini quilt can be completed in just a few hours or a weekend. You can experiment with bold patterns, bright colors, and unique layouts, all on a small scale. Plus, they make perfect wall art, gifts, or functional pieces like mug rugs and table toppers.
Throughout this Modern Mini Quilt Tutorial, we’ll walk through the essential steps: choosing materials, cutting and assembling your quilt top, adding layers and quilting, and finishing your project with professional results. By the end, you’ll not only have a finished mini quilt but also a deeper understanding of modern quilting principles and techniques that you can apply to future projects.
Choosing Your Modern Mini Quilt Design
The first step in this Modern Mini Quilt Tutorial is selecting your design. Modern quilting emphasizes bold shapes, negative space, and a fresh aesthetic. When choosing your layout, think geometric: triangles, stripes, curves, and improvisational blocks are all excellent places to begin.
One great thing about mini quilts is that you can play with color and pattern combinations without the risk of wasting a lot of fabric. Pull out your scraps, fat quarters, or charm packs and lay them out on a flat surface. Consider using a color palette with high contrast—like black and white, or complementary hues like teal and orange—to give your mini quilt a modern punch.
You can sketch your idea on paper or use a digital quilting app to preview your block arrangement. There’s no wrong way to plan a mini quilt, and creativity is key. Whether you prefer minimalist grids or freeform art quilts, follow your instincts and let your fabric choices shine.
Once you’ve settled on a design, determine the size of your mini quilt. Standard mini quilts range from 12×12 inches to 24×24 inches. Keep in mind where you plan to display or use it, and adjust accordingly. A smaller project also means less time spent quilting and binding, making it ideal for practicing new skills.
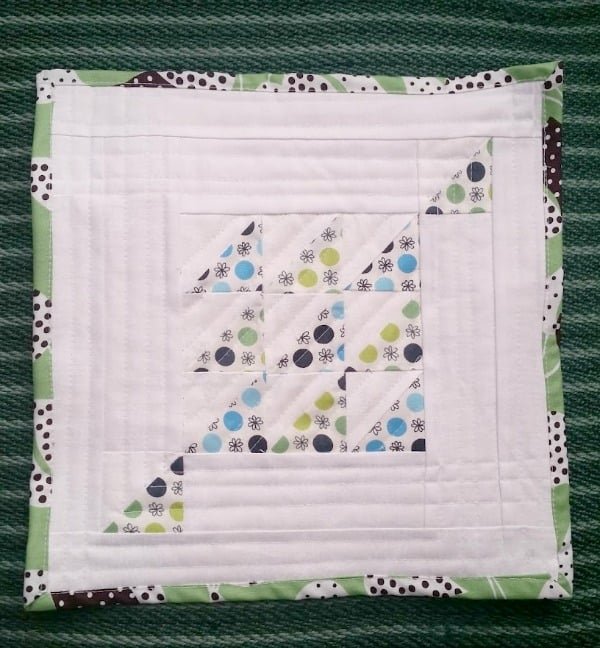
If you’re not confident designing your own layout just yet, consider starting with a basic modern block like a log cabin variation or half-square triangles arranged asymmetrically. Even simple blocks can look sophisticated with the right color placement and quilting lines.
The most important thing at this stage is to feel inspired. If you’re excited about your fabric choices and layout, that enthusiasm will carry through the rest of the quilting process.
Preparing and Assembling the Quilt Top
With your design ready, it’s time to cut and piece your quilt top. Begin by ironing all your fabric to ensure accurate cutting. For a clean, modern look, use a rotary cutter, quilting ruler, and self-healing mat to make precise cuts.
Follow your layout or sketch and cut all necessary fabric pieces. Be mindful of seam allowances—most quilt patterns, including mini quilts, use a standard ¼ inch seam allowance. This ensures consistency and a better fit when sewing pieces together.
Start assembling your quilt top by sewing two pieces together at a time, gradually building out the block or layout. Use straight pins or fabric clips to hold seams in place. Take your time, and press seams open or to one side as you go for a crisp, flat finish.
Check your alignment often. If your seams or points don’t match up perfectly, don’t stress—mini quilts are a great place to learn and improve. Minor imperfections often disappear once quilting and binding are complete.
As you piece your quilt top, keep the principles of modern quilting in mind: clean lines, intentional asymmetry, and strong contrast. If you feel something looks off, try rearranging or swapping fabrics until it clicks. Trust your creative instincts.
Once the quilt top is fully assembled, give it a final press with an iron. Trim any uneven edges so that your top is square and ready for layering. This step sets the foundation for smooth quilting and binding later on.
Quilting Your Mini Masterpiece
Now comes the fun part—quilting your mini quilt. Begin by creating a quilt sandwich: place your quilt backing right-side down, your batting in the middle, and your quilt top right-side up. Make sure all layers are smooth and wrinkle-free.
Use safety pins or basting spray to hold the layers together. Since mini quilts are small, they’re easy to maneuver on a home sewing machine, and you don’t need a long arm machine to achieve beautiful results.
Decide on your quilting style. Straight-line quilting is a favorite for modern quilts—it’s simple, elegant, and emphasizes geometric shapes. You can sew parallel lines, crosshatch, or even echo quilt around blocks for added dimension.
Free-motion quilting is another option if you’re comfortable with more organic shapes. Spirals, loops, and meandering lines can soften a bold design or add movement to minimalist compositions. Take a scrap piece to practice before quilting your actual project.
When quilting, start in the center and work outward to prevent puckering. Use a walking foot or quilting foot for smooth stitching and better control. Keep your stitch length consistent and your lines evenly spaced.
After quilting, inspect the front and back of your mini quilt. Trim away any excess batting and backing, and square up your quilt again if needed. You’ll start to see your vision coming to life at this stage, and it’s incredibly satisfying.
Binding and Finishing Touches
The final step in this Modern Mini Quilt Tutorial is adding the binding. This finishes the edges and gives your mini quilt a clean, professional look. Start by cutting strips of fabric—typically 2.25 inches wide—for your binding.
You can use straight-grain binding or bias binding if your quilt has curved edges. Sew your strips together to make one continuous piece long enough to go around the entire quilt with a few extra inches for overlap.
Fold your binding strip in half lengthwise, wrong sides together, and press. Then align the raw edge of the binding with the edge of the quilt and sew it to the front using a ¼ inch seam. Miter the corners for a clean, sharp turn.
Fold the binding over to the back of the quilt and secure it using hand stitching or machine stitching. If you’re hand-binding, use a ladder stitch for an invisible finish. Machine binding is quicker but requires precision to avoid visible lines on the front.
To complete your mini quilt, consider adding a label or hanging sleeve. Labels are great for noting your name, date, and the quilt’s title or inspiration. A hanging sleeve makes it easy to display your work on a wall or quilt show.
Take a moment to admire your finished modern mini quilt. Whether it’s your first or your fiftieth, every project represents your unique creativity and progress as a maker. Don’t forget to photograph it and share it with your quilting community!
Modern Mini Quilt Tutorial
What size is considered a mini quilt?
A mini quilt typically measures between 12×12 inches and 24×24 inches. However, there’s no strict rule, and you can adjust the size based on your preference or intended use.
Can beginners make a mini quilt?
Absolutely! This Modern Mini Quilt Tutorial is designed with beginners in mind. The smaller size makes it less intimidating, and it’s a perfect way to practice new quilting skills.
What fabrics work best for mini quilts?
100% cotton quilting fabrics are ideal. They’re easy to cut, sew, and press. Scraps, fat quarters, or charm packs are perfect for these small projects.
Do I need special tools for quilting?
A few basic tools will go a long way: a rotary cutter, quilting ruler, cutting mat, iron, and sewing machine. For quilting, a walking foot can help with even stitches.
How do I display a mini quilt?
Mini quilts make great wall hangings. Add a hanging sleeve or use clips and rods. They’re also beautiful as table toppers, placemats, or gifts.
Can I wash a mini quilt?
Yes. Use cold water and a gentle cycle if washing by machine, or hand wash and air dry to maintain the shape. Always test your fabrics for colorfastness beforehand.
This Modern Mini Quilt Tutorial has walked you through every step of the process, from choosing a design and assembling your quilt top to quilting, binding, and finishing your work. Along the way, you’ve learned how to apply modern quilting principles in a manageable and rewarding format.
Whether you plan to make just one or get hooked on the joy of mini quilting, the skills and creativity you’ve gained are sure to carry into future projects. Modern mini quilts offer a perfect blend of artistry, functionality, and fun.
If you enjoyed this tutorial, please share your thoughts and experiences. I’d love to hear your honest opinion and any suggestions for future guides. Happy quilting!