
DIY Sewing Machine Mat or Cover projects are among the most enjoyable and rewarding sewing tasks for crafters of all levels. Whether you’re new to sewing or have years of experience, creating your own sewing machine mat or cover allows you to personalize your workspace, protect your machine, and express your creativity. A handmade mat helps reduce vibrations and noise, while a custom cover keeps your machine clean and dust-free. This article will guide you through every step — from choosing the right materials to adding finishing touches — while keeping the process simple, functional, and fun.
Making a DIY sewing machine mat or cover is not just a creative outlet but also a practical addition to your sewing setup. Many sewing enthusiasts find that their machines need extra stability on smooth surfaces. A padded mat can provide that stability, preventing slipping and absorbing vibration. Additionally, a personalized cover is a stylish way to protect your investment from lint, sunlight, and accidental spills when the machine is not in use.
Before diving into the details, remember that every sewing project is an opportunity to enhance your skills. By learning how to design and sew your own sewing machine mat or cover, you’ll improve precision cutting, fabric selection, and decorative techniques. Let’s explore the process and all the details that will make your project a success.
Choosing Materials and Tools for Your DIY Sewing Machine Mat or Cover
When beginning your DIY sewing machine mat or cover, selecting the right materials is crucial. The base fabric should be durable, such as quilting cotton, canvas, or denim. These fabrics provide strength and stability while still being easy to sew. If you want extra padding, consider using batting or felt as an inner layer to protect your tabletop and minimize machine noise.
Choosing the right thread also matters. Use a high-quality polyester or cotton thread that matches or contrasts beautifully with your fabric. For a professional finish, make sure your needle is sharp and appropriate for the fabric thickness. If your mat will have pockets or straps, you’ll also need interfacing to reinforce these sections.
Cutting accuracy is key to achieving clean results. Use a rotary cutter, self-healing mat, and a clear ruler to ensure straight edges. For the cover version, take exact measurements of your sewing machine—height, width, and depth—and add seam allowances for a perfect fit.
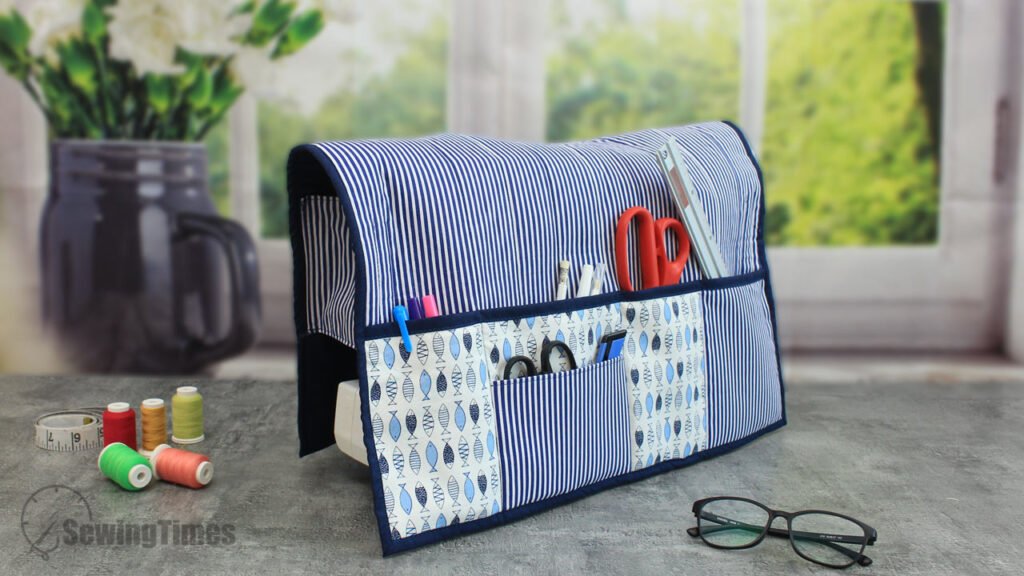
Adding accessories such as binding tape, Velcro, or elastic can give your project versatility. Many crafters like to add pockets to their mats to store scissors, thread spools, and small tools. A DIY sewing machine mat or cover that includes these thoughtful details will not only look beautiful but also make your workspace more functional.
If you plan to quilt your mat, mark your quilting lines with a washable fabric pen before stitching. Quilting adds texture and structure, making your mat both stylish and sturdy. Remember to press your fabric pieces before assembling; this ensures smooth seams and professional-looking results.
Step-by-Step Guide to Making a DIY Sewing Machine Mat
Creating your DIY sewing machine mat can be done in a few simple steps, and even beginners can achieve a professional look. Start by deciding the size of your mat based on your workspace and machine size. A common dimension is around 24 inches by 18 inches, but feel free to adjust it according to your table space.
Next, cut your top fabric, batting, and backing fabric to the same dimensions. Layer them like a quilt sandwich—backing at the bottom, batting in the middle, and top fabric facing up. Pin the layers together or use quilting clips to keep everything aligned while you sew.
Quilt the layers together by sewing straight lines or decorative patterns. This step gives your mat texture and durability. You can experiment with diagonal stitching or free-motion quilting to add personality to your project.
Once your quilting is complete, trim the edges and add bias binding around the perimeter. Binding not only conceals raw edges but also gives your mat a polished finish. If you want, add pockets on one side by sewing an additional strip of fabric and dividing it into compartments for your tools.
To prevent slipping, you can attach a non-slip mat or rubberized fabric to the bottom. This extra layer keeps your DIY sewing machine mat stable, especially on smooth or polished tables. Finally, press the mat carefully to remove any wrinkles, and admire your functional and beautiful creation.
How to Sew a Protective DIY Sewing Machine Cover
A DIY sewing machine cover is another essential accessory to keep your equipment in top condition. Start by measuring your sewing machine carefully—width, height, and depth. Add one inch to each measurement to allow for seam allowances. You’ll need fabric for the outer layer, lining, and possibly a stabilizing layer like fusible interfacing.
Cut two side panels, one front, one back, and one top panel. Sew the panels together using a straight stitch, ensuring that the right sides face each other. Once all sides are attached, press the seams open for a crisp appearance. For added style, consider using coordinating fabrics for the sides or top panel.
If you’d like to make the cover more decorative, add appliqué designs, embroidery, or quilting on the outer layer. These details make your project stand out and showcase your personality. A handle on the top can also make removing and replacing the cover easier.
Adding a lining gives your DIY sewing machine cover a professional finish and helps it hold its shape. Sew the lining in the same way as the outer cover, then fit them together with wrong sides touching. Topstitch around the bottom edge for neatness.
You can secure the bottom with elastic, Velcro, or a drawstring for a snug fit. This will prevent dust and dirt from getting inside. Once complete, your sewing machine will have both protection and personality, thanks to your creativity and skill.
Decorating and Personalizing Your DIY Sewing Machine Mat or Cover
The best part about any DIY sewing machine mat or cover project is making it uniquely yours. Decoration is where your imagination can shine. You can personalize your mat or cover using embroidery, fabric paint, or heat-transfer vinyl designs that reflect your style.
If you enjoy quilting, add patchwork details or colorful trims. Combining different fabric patterns like florals, stripes, or solids gives a lively and creative touch. These designs also make your workspace more inviting and inspiring.
Add functional embellishments such as pockets, loops, or detachable organizers. A pocket can hold your scissors or thread spools, while loops can store measuring tapes or small rulers. You can even attach clear vinyl sections to see what’s inside.
For a professional appearance, match your thread colors carefully and press every seam flat. Topstitching along edges also adds a refined look. This small detail can make your handmade DIY sewing machine mat or cover appear store-bought.
You can also label your creation with a small fabric tag that includes your name or initials. This adds a personal signature to your project and shows pride in your craftsmanship. Whether for yourself or as a thoughtful handmade gift, your creation will be both practical and meaningful.
Finally, remember that creativity has no limits. Experiment with color combinations, stitch types, and textures. Every DIY sewing machine mat or cover is an opportunity to express who you are as a maker and add a special touch to your sewing area.
Maintenance Tips for Your DIY Sewing Machine Mat or Cover
Once you’ve finished your DIY sewing machine mat or cover, proper care will ensure it lasts for years. Start by washing your fabrics before sewing to prevent shrinkage. After completion, spot-clean or gently hand-wash your mat or cover as needed, especially if you use it frequently.
Avoid harsh detergents or bleach, as these can weaken fibers and fade colors. Instead, use mild soap and cold water to maintain the beauty of your fabric. Always dry your mat or cover flat to preserve its shape and prevent warping.
Ironing is another essential step. Use a warm iron with steam to smooth wrinkles, but be careful with synthetic or heat-sensitive materials. Always test on a small area first to avoid damage.
If your mat includes pockets or compartments, empty them before washing to protect your machine and accessories. You can also reinforce worn-out edges with bias tape or restitch loose seams to keep everything sturdy.
For covers, occasionally check the elastic or Velcro closures to ensure they still fit securely. Replace them if needed to keep dust and debris out. With these maintenance steps, your DIY sewing machine mat or cover will stay as functional and beautiful as the day you made it.
Lastly, remember to store your cover properly when not in use. Keeping it folded neatly in a dry area prevents mildew or color fading. Proper care not only extends the life of your project but also showcases your commitment to quality craftsmanship.
About DIY Sewing Machine Mat or Cover
1. What fabric is best for a DIY sewing machine mat or cover?
The best fabrics are durable materials such as quilting cotton, canvas, or denim. These provide structure and longevity while remaining easy to sew.
2. Can I wash my sewing machine mat?
Yes, most mats can be hand-washed or machine-washed on a gentle cycle. Always check your fabric type and use mild detergent to prevent fading.
3. How thick should the padding be?
Use one or two layers of batting, depending on how much cushioning you prefer. Too thick can make it harder for your machine to stay stable.
4. How do I stop my mat from slipping?
You can attach a non-slip backing, such as rubberized fabric or silicone dots, to the bottom of your mat to keep it in place.
5. Can I make both a mat and a cover as a matching set?
Absolutely! Many sewists enjoy creating coordinated sets with matching fabrics and trims for a cohesive look in their sewing space.
6. Do I need a sewing pattern?
Not necessarily. You can design your own by measuring your machine and workspace. However, using a pattern can save time and ensure accuracy for beginners.
7. How long does it take to make a DIY sewing machine mat or cover?
Depending on your experience level, the project can take anywhere from two to five hours, including cutting, sewing, and finishing details.
8. What if I don’t have quilting tools?
You can still complete the project using basic sewing tools like scissors, a ruler, and pins. Quilting tools simply make cutting and measuring easier.
9. Can I personalize it with my name or logo?
Yes! Use embroidery, iron-on vinyl, or printed fabric labels to personalize your mat or cover with your name or unique design.
10. Is it beginner-friendly?
Yes, a DIY sewing machine mat or cover is an ideal beginner project. It teaches essential sewing techniques like cutting, stitching, and binding.
Creating your own DIY sewing machine mat or cover is both practical and enjoyable. You’ve learned how to choose materials, measure and sew, add decoration, and maintain your creation for long-lasting use. With a little patience and creativity, you can design a project that’s functional, stylish, and uniquely yours.
Now it’s your turn—try making your own version and share your experience! What did you enjoy most about the process? Leave your honest opinion and suggestions about this article so others can be inspired to start their own sewing journey.