
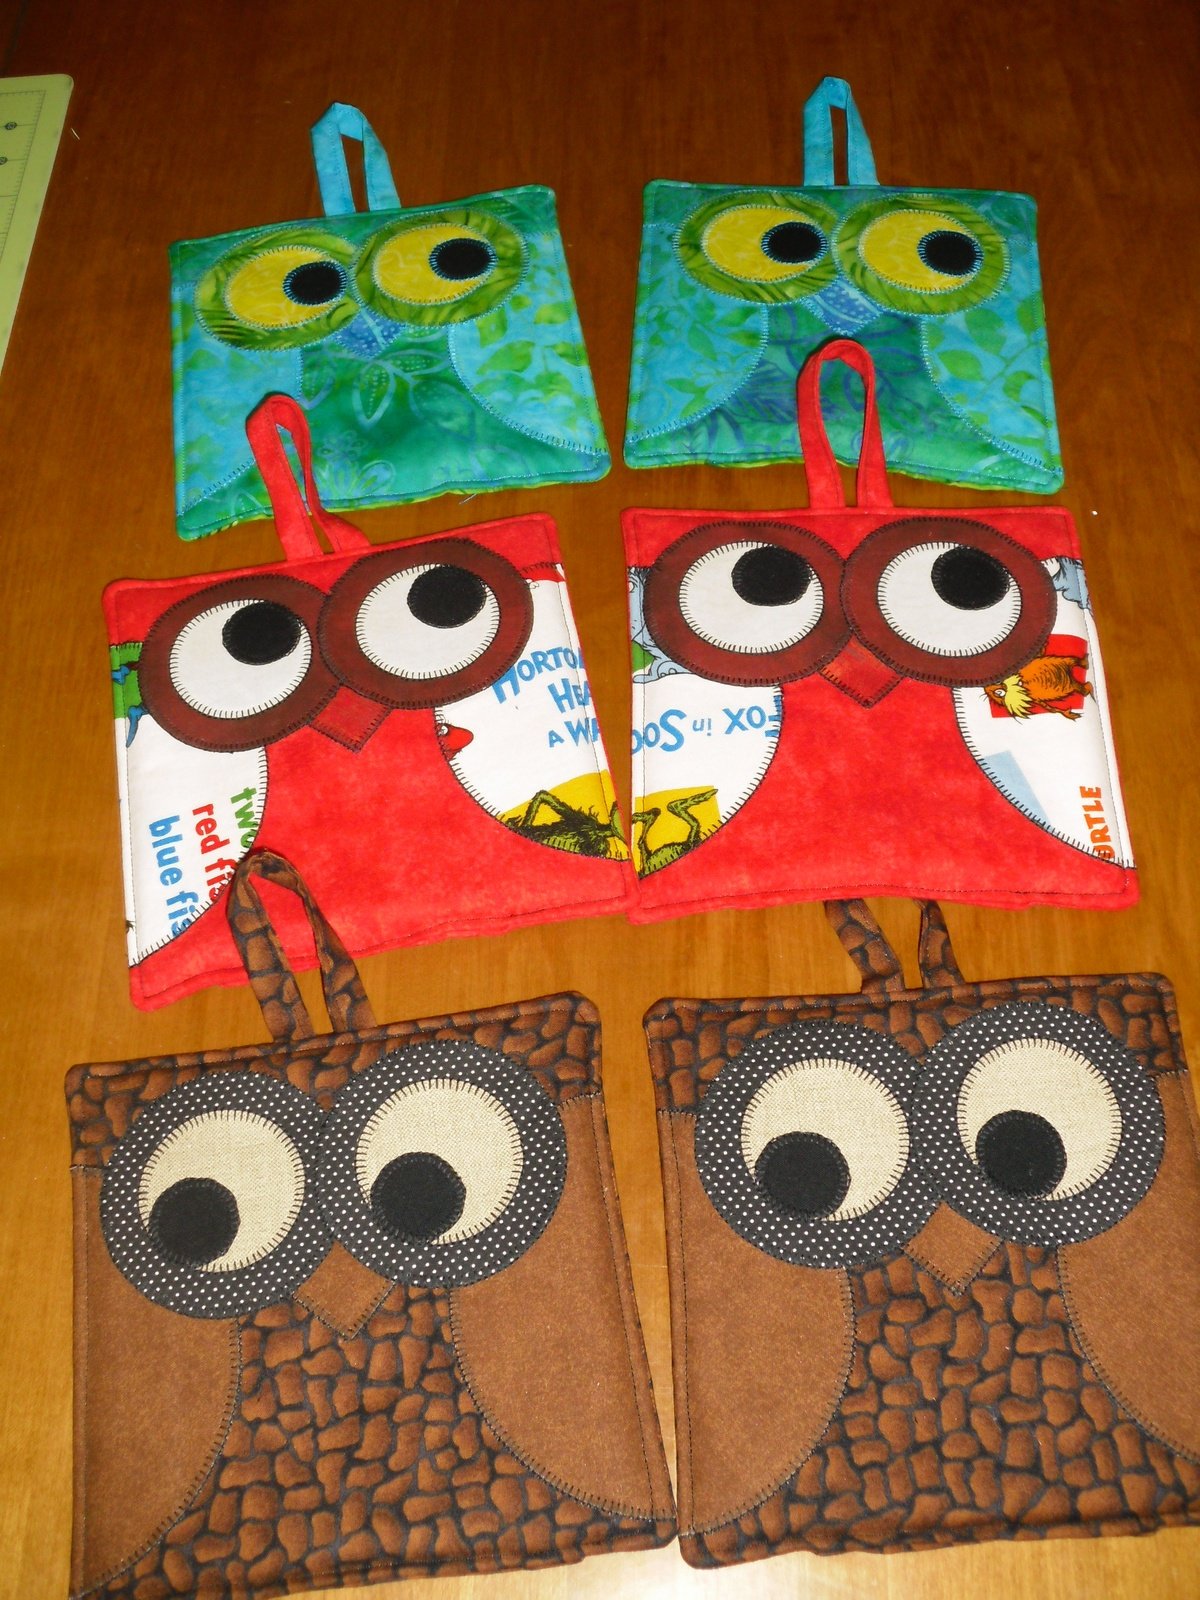
If you love mixing creativity with practicality, this DIY Owl Potholder Sewing Tutorial will be the perfect addition to your next crafting session. Not only is it a fun project for sewing enthusiasts of all skill levels, but it’s also a charming way to bring personality into your kitchen. Whether you’re making it for yourself or as a thoughtful handmade gift, this project blends style and function in the most adorable way.
The beauty of this project is that you can customize every detail — from fabric patterns to colors — to match your home décor or the recipient’s taste. You don’t need to be an expert seamstress to make this potholder. With a little patience and a few basic sewing techniques, you can create a unique piece that will make cooking or baking even more enjoyable.
In this guide, you’ll find step-by-step tips and practical advice on how to complete your DIY Owl Potholder Sewing Tutorial with ease. By the end, you’ll have a beautiful, functional potholder shaped like an owl that is perfect for protecting your hands from hot dishes, all while adding a touch of handmade charm to your kitchen space.
Choosing the Right Materials for Your DIY Owl Potholder
Selecting the right materials is essential for making your DIY Owl Potholder Sewing Tutorial a success. The fabric, padding, and thread you choose will determine not only the appearance but also the durability and safety of the potholder.
First, opt for 100% cotton fabric for both the outer layer and the lining. Cotton is heat-resistant, washable, and holds its shape well, making it ideal for kitchen accessories. Avoid synthetic fabrics, as they can melt or warp under heat.
Second, for the inner layer, use heat-resistant batting. This material acts as insulation and protects your hands from hot cookware. You can find batting specifically designed for potholders at most fabric or craft stores.
Third, pick a sturdy, high-quality thread that matches or contrasts nicely with your fabric. Polyester-cotton blend thread is a popular choice for strength and flexibility.
Fourth, consider adding decorative fabrics for the owl’s wings, eyes, and beak. Using small fabric scraps for these details is a great way to recycle leftover materials from previous projects.
Fifth, don’t forget to have basic sewing tools ready: sharp scissors, pins or clips, a sewing machine, and an iron. Having everything prepared before you begin will make the process smoother and more enjoyable.
Finally, think about your color scheme. Soft pastels can give a sweet, whimsical look, while bold patterns make your owl potholder stand out as a statement piece in your kitchen.
Step-by-Step Instructions for Sewing Your Owl Potholder
Creating your DIY Owl Potholder Sewing Tutorial involves a few straightforward steps. Follow these carefully, and you’ll have a delightful and functional potholder in no time.
First, cut out all the fabric pieces according to your pattern. You’ll need a front and back piece for the potholder body, two wing shapes, two eye circles, and a small triangle for the beak. Remember to cut batting pieces for the front and back as well.
Second, layer the batting between the outer and lining fabric for both the front and back pieces. Pin them securely to keep them from shifting while sewing.
Third, attach the decorative details to the front piece. Sew on the wings first, followed by the eyes and beak. You can use either straight stitches or zigzag stitches to secure them.
Fourth, with right sides together, sew the front and back pieces of the potholder together, leaving a small opening for turning. Be sure to use a seam allowance of about ¼ inch.
Fifth, turn the potholder right side out through the opening. Use a pointed tool, like a chopstick, to push out the corners and edges neatly.
Finally, topstitch around the entire edge of the potholder to close the opening and give it a finished look. This also reinforces the seams for durability.
Tips for Personalizing Your Owl Potholder
One of the joys of following a DIY Owl Potholder Sewing Tutorial is the freedom to make it truly your own. Personalizing your design ensures your potholder reflects your personality and style.
First, experiment with different fabric textures. Try mixing smooth cotton with textured linen or quilted fabric for a unique tactile experience.
Second, play with color combinations. If you love bright and cheerful designs, combine vibrant patterns for the owl’s wings and body. For a more subtle look, stick with neutral tones or monochromatic shades.
Third, add embellishments. Small buttons, embroidery stitches, or even fabric paint can bring extra charm and detail to your owl.
Fourth, change the size of the potholder to suit your needs. A larger version can double as a trivet for hot pots, while a smaller one works well for grabbing lids or small dishes.
Fifth, create a loop for hanging. This not only makes storage easy but also turns your potholder into a decorative piece in your kitchen.
Finally, make sets in different colors or themes — perfect for seasonal decorations or gifting to friends and family.
Caring for and Maintaining Your Owl Potholder
To keep your DIY Owl Potholder Sewing Tutorial creation looking fresh and functional, proper care is important.
First, always wash your potholder in cold or lukewarm water with a mild detergent. This helps preserve the colors and prevent shrinkage.
Second, air dry your potholder rather than using a dryer, as high heat can weaken the batting and damage decorative elements.
Third, if your potholder becomes stained, spot clean it immediately to prevent permanent marks.
Fourth, avoid using bleach, as it can break down fibers and fade the fabric.
Fifth, check the seams periodically. If you notice any loose threads or fraying edges, repair them promptly to extend the life of your potholder.
Finally, store your potholder in a dry place when not in use. Humidity can encourage mold growth, especially if the potholder is not completely dry after washing.
DIY Owl Potholder Sewing Tutorial
1. Do I need a sewing machine to make this potholder?
While a sewing machine makes the process faster, you can hand-sew the entire project if you prefer. It will take more time, but the results can be just as charming.
2. Can I use old clothes for the fabric?
Yes! Recycling fabric from old clothing is a wonderful way to give your potholder character and reduce waste. Just make sure the fabric is 100% cotton and in good condition.
3. Is heat-resistant batting absolutely necessary?
Yes, if you plan to use the potholder with hot cookware. It provides crucial protection for your hands.
4. Can I wash my owl potholder in a washing machine?
Yes, but use a gentle cycle and mild detergent to maintain its shape and colors.
5. How long does it take to make one potholder?
On average, it takes about 1–2 hours, depending on your sewing experience and the complexity of your design.
6. Can children help with this project?
Yes, children can participate in the design and decoration stages. However, adults should handle the sewing for safety reasons.
7. What size should I make my potholder?
A common size is about 8 inches in diameter, but you can adjust this based on personal preference.
8. Can I sell potholders I make using this tutorial?
Yes, as long as the design is your own interpretation and not an exact copy of someone else’s copyrighted pattern.
9. What’s the best stitch for attaching the owl’s details?
A zigzag stitch works well for securing appliqué details like the wings and beak, but straight stitching can also be used for a cleaner look.
10. Can I make other animals using this tutorial?
Absolutely! Once you master the owl shape, you can adapt the pattern to create cats, foxes, or other fun designs.
Creating your own DIY Owl Potholder Sewing Tutorial project is a delightful way to combine creativity, practicality, and handmade charm. From choosing the perfect materials to adding personal touches, this project allows for endless customization and makes for a unique kitchen accessory or heartfelt gift.
Now that you’ve learned how to bring your owl potholder to life, I’d love to hear your thoughts. Share your honest opinion about this tutorial and let me know any suggestions you have for improving or adding new ideas to future projects. Your feedback is always welcome and appreciated.