
The Skull Crochet Pillow has become one of the most creative and trendy home décor items among crochet lovers. Combining the beauty of handcrafted art with a touch of edgy style, this pillow design adds personality to any room. Whether you’re decorating a cozy reading corner or a modern living space, a Skull Crochet Pillow brings a perfect mix of comfort and originality. Handmade pillows always have a unique charm, but this one stands out for its fun, bold design and versatile appeal.
Crocheting a skull pattern may sound complicated at first, but it’s actually quite fun once you get into the rhythm. The project allows you to play with colors, textures, and yarn thickness to create something truly your own. Many crafters enjoy making several versions—one in classic white and black for a gothic look, another in bright hues for a playful twist. The Skull Crochet Pillow isn’t just for Halloween; it can be an all-year statement piece that reflects your unique style.
One of the best things about crochet projects like this is how they combine creativity and practicality. You’re not only designing something beautiful but also making a functional item that adds warmth and texture to your home. Plus, working on a Skull Crochet Pillow can be deeply relaxing and rewarding, especially when you see the final design come together stitch by stitch. Whether you’re an experienced crocheter or a beginner eager to try new patterns, this pillow is a great way to showcase your skills and express your personality.
Choosing the Perfect Materials for Your Skull Crochet Pillow
The materials you choose for your Skull Crochet Pillow can make a big difference in how it looks and feels. Start with soft yet durable yarn that’s easy to work with. Cotton or acrylic blends are popular choices because they hold their shape well and are easy to wash. If you want a more luxurious feel, you can try bamboo or wool yarns, but remember they may require gentler care. Always consider the texture you want—smooth and sleek or warm and fuzzy.
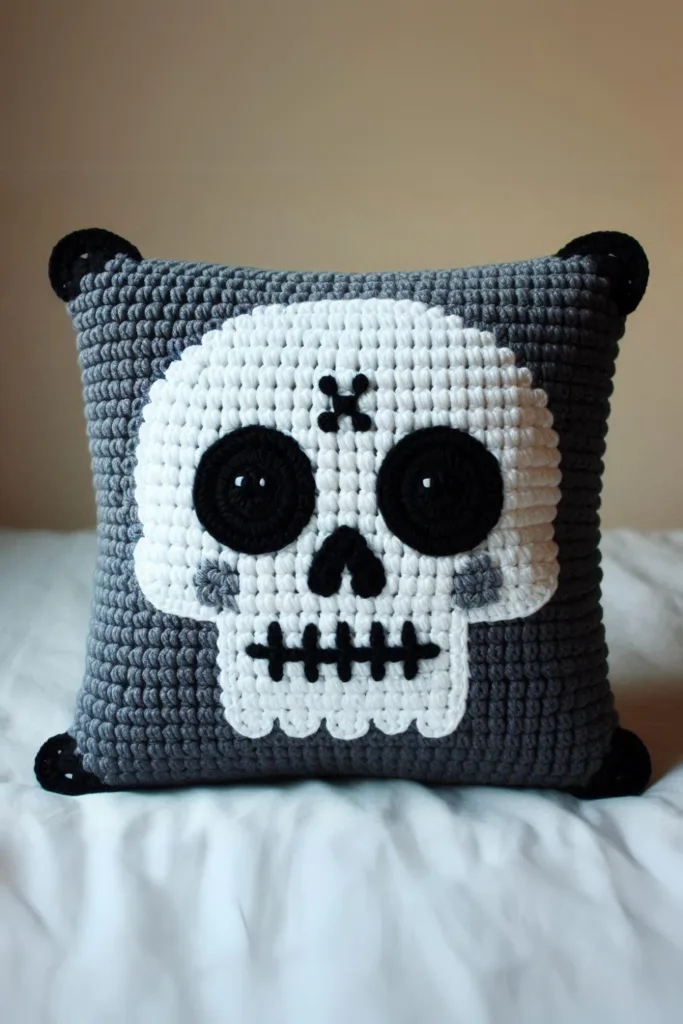
The color palette is also a big part of your design. The traditional skull pattern often uses white for the skull and black for the background, creating a bold contrast. However, don’t be afraid to experiment. Try neon shades for a punk-inspired pillow or pastel tones for a more whimsical version. The choice of colors can completely transform the vibe of your project, making your Skull Crochet Pillow stand out in any room.
Choosing the right hook size is another important step. A smaller hook will give your stitches a tighter, more defined look, while a larger one will make the pillow softer and more flexible. Beginners may find medium-sized hooks easier to handle since they provide a balance between control and speed. Make sure to check your gauge before starting the full project to ensure your pillow comes out the right size.
The filling is just as essential as the outer design. Use a good-quality pillow insert or fiberfill stuffing that maintains its shape over time. If you prefer an eco-friendly approach, you can even use recycled fabric scraps for stuffing. A well-stuffed Skull Crochet Pillow will keep its form and provide comfortable support, whether it’s placed on a bed, sofa, or armchair.
Pay attention to finishing touches like seams and edges. A neat border or a decorative stitch around the edges can elevate your pillow’s overall look. Some crocheters even add tassels or fringes for extra flair. These small details can turn a simple Skull Crochet Pillow into a professional-looking masterpiece that catches everyone’s eye.
Lastly, always take time to block your work if necessary. Blocking helps smooth out any uneven stitches and gives your crochet piece a polished finish. It’s a simple but often overlooked step that can make your Skull Crochet Pillow look perfectly shaped and ready for display.
Step-by-Step Guide to Making a Skull Crochet Pillow
Creating your Skull Crochet Pillow starts with selecting a pattern that suits your skill level. Many free and paid patterns are available, ranging from simple to intricate designs. Beginners can start with a basic skull motif that uses simple stitches like single and double crochet. As you gain confidence, you can try more detailed patterns that include color changes and textured stitches for a 3D effect.
Begin by crocheting the front panel, which usually features the skull design. This is the most creative part of the process. You’ll follow a chart or pattern that shows where each stitch and color change goes. Some crafters prefer using the tapestry crochet technique to keep color transitions clean and neat. The Skull Crochet Pillow front panel is where your design comes to life, so take your time and enjoy the process.
Once the front is complete, you’ll need to crochet the back panel. This side can be as simple or as decorative as you like. Many people choose a solid color for the back to keep the focus on the skull design. Others may add stripes or textured stitches for added interest. Both panels should be the same size so they fit together perfectly when joined.
Next comes assembling the pillow. Align the two panels with the right sides facing out, and use slip stitches or single crochet around the edges to join them. Leave one side open to insert the stuffing or pillow form. Once filled to your liking, close the remaining side with the same joining method. Your Skull Crochet Pillow is now complete and ready to brighten up your space.
If you’d like to personalize it even more, consider adding embellishments such as buttons for eyes, embroidery for details, or beads for sparkle. These creative touches can make your Skull Crochet Pillow truly one-of-a-kind. You can even customize the skull’s expression—make it smiling, spooky, or cute depending on your mood.
Finally, give your pillow a gentle hand wash if needed, and let it dry flat to maintain its shape. Once dry, it’s ready to decorate your home or serve as a unique handmade gift that will surely impress friends and family.
Creative Design Ideas for Your Skull Crochet Pillow
When it comes to customizing your Skull Crochet Pillow, the possibilities are endless. One popular idea is to create themed versions for different occasions. For example, use orange and black for a Halloween look, or red and green for a festive holiday pillow. This allows you to reuse the same pattern but achieve a completely different aesthetic every time.
If you love colorwork, try creating a sugar skull design inspired by Día de los Muertos. Add vibrant floral patterns around the skull and experiment with colorful yarns to give it a celebratory feel. This kind of design makes the Skull Crochet Pillow a centerpiece of your décor, adding both cultural flair and artistic detail to your home.
Another creative approach is to use textured stitches like bobble, puff, or popcorn stitches to add dimension to your skull design. These techniques give your pillow a tactile quality that makes it even more eye-catching. Combining texture and color can transform a simple crochet project into a show-stopping piece of art.
For those who prefer a minimalist look, stick with neutral shades like cream, gray, or black. This version of the Skull Crochet Pillow fits beautifully in modern or industrial-style interiors. You can even use metallic yarns to add a subtle shine without overpowering the design. Minimalist doesn’t mean boring—it means every detail counts.
You can also play with size and shape. Instead of a square pillow, try making a rectangular or round version. Changing the shape can give your Skull Crochet Pillow a fresh perspective and make it fit better in different settings like chairs, beds, or benches. The design is flexible enough to adapt to your preferences.
Lastly, consider creating a full set of matching skull-themed items, such as blankets, coasters, or wall hangings. Coordinating these pieces gives your space a cohesive look and lets your creativity shine through in every corner. A Skull Crochet Pillow can be the centerpiece of a bold, handcrafted home collection that expresses your individuality.
Tips for Beginners and Advanced Crocheters
If you’re new to crochet, don’t be intimidated by the Skull Crochet Pillow design. Start small and focus on mastering basic stitches. Practice on simple motifs before diving into the full project. You can even crochet small skull appliqués and use them on other crafts like tote bags or scarves. This helps you gain confidence and build your skills gradually.
Advanced crocheters can challenge themselves by experimenting with intricate skull patterns that involve multiple color changes and advanced stitch techniques. Consider incorporating lacework or overlay crochet for a stunning 3D look. The Skull Crochet Pillow offers endless opportunities to push your creativity and technical skills to the next level.
Another tip for success is maintaining even tension throughout your work. Uneven stitches can distort the skull design and affect the final shape of your pillow. Take breaks when needed to avoid hand fatigue and keep your stitches consistent. Remember, crochet is an art form—it’s okay to take your time.
Joining online crochet communities can also be incredibly helpful. Sharing your progress and learning from others who’ve made similar projects can keep you motivated. You might even find new pattern ideas or get advice on color combinations for your Skull Crochet Pillow.
If you plan to sell your handmade pillows, make sure your finishing work is clean and professional. Use a yarn needle to weave in loose ends neatly and ensure that the pillow seams are secure. Presentation matters when showcasing your work, and a well-finished Skull Crochet Pillow can become a best-seller at craft fairs or online shops.
Finally, remember to enjoy the creative process. Crocheting should bring relaxation and joy, not stress. Each stitch is part of a journey, and when you finish your Skull Crochet Pillow, you’ll have a handmade piece filled with love and creativity.
Skull Crochet Pillow
1. What yarn is best for a Skull Crochet Pillow?
A soft cotton or acrylic blend works best because it’s comfortable, durable, and easy to wash.
2. Can beginners make a Skull Crochet Pillow?
Yes! Start with a simple pattern that uses basic stitches. As you gain confidence, you can move on to more detailed designs.
3. How long does it take to make a Skull Crochet Pillow?
Depending on your skill level, it can take anywhere from a few hours to a few days.
4. Can I wash my Skull Crochet Pillow?
Yes, but hand washing is recommended. Always let it dry flat to maintain its shape.
5. Is the Skull Crochet Pillow suitable for gifts?
Absolutely! Handmade pillows make thoughtful and unique gifts for friends and family.
6. Can I customize the size of the Skull Crochet Pillow?
Of course. You can adjust your pattern or hook size to create smaller or larger versions.
7. How can I make my Skull Crochet Pillow look professional?
Use even tension, clean seams, and block your finished work to achieve a polished look.
The Skull Crochet Pillow is a perfect blend of creativity, comfort, and personal expression. From choosing the right yarn and colors to experimenting with unique patterns, every step of the process is a rewarding experience. Whether you’re a beginner or an experienced crocheter, this project offers endless opportunities to showcase your artistic side.
Now that you’ve learned how to make your own Skull Crochet Pillow, what do you think? Have you tried this project before, or do you plan to start one soon? Share your honest opinions and suggestions—I’d love to hear your thoughts!