
How to crochet the Making Waves table runner is a delightful project for anyone who loves crafting and home decor. This pattern combines creativity with functionality, resulting in a stunning piece that can elevate any dining or coffee table. By learning this pattern, you can make a unique and elegant table runner that reflects your personal style while improving your crochet skills.
Crocheting the Making Waves table runner is not only a craft but also a therapeutic experience. The gentle rhythm of crocheting each stitch allows you to focus, relax, and enjoy the process. This project is perfect for both beginners and experienced crocheters who want to explore a beautiful wave-inspired design.
Before starting, it is essential to prepare all your materials and understand the structure of the Making Waves table runner. Having the right yarn, crochet hook, and accessories will ensure that your project progresses smoothly and the final result is polished and professional.
Understanding the Making Waves Pattern
The Making Waves table runner pattern is designed to create a flowing, wave-like effect through strategic increases and decreases in stitches. This design gives the table runner a dynamic and eye-catching look.
The foundation of this pattern begins with a chain that determines the width of your table runner. It is essential to maintain even tension in the chains to achieve uniform waves throughout the project.
Each row in the Making Waves table runner alternates between different stitch heights, such as single crochet, double crochet, and sometimes treble crochet. This variation in stitch height contributes to the ripple effect of the waves.
Color choices can greatly enhance the impact of the Making Waves table runner. Gradient yarns or multiple shades of the same color can emphasize the wave movement, while solid colors can create a classic and elegant appearance.
Using stitch markers is highly recommended for this pattern. They help you keep track of where increases and decreases occur, ensuring that the waves remain consistent and symmetrical across the table runner.
Practicing patience is crucial when working on the Making Waves table runner. Although the pattern may seem intricate at first, taking it step by step will result in a stunning piece that you can proudly display.
Materials and Tools Needed
To create the Making Waves table runner, you will need high-quality yarn, a suitable crochet hook, stitch markers, scissors, and a yarn needle. Choosing the right materials ensures durability and a professional finish.
Cotton yarn is often preferred for table runners because it is strong, smooth, and easy to wash. It also provides a clean look that complements the wave pattern beautifully.
Selecting the correct crochet hook is critical. Using the recommended size for your yarn ensures consistent tension and helps maintain the integrity of the wave design. Hooks that are too small or too large can distort the pattern.
Other tools, such as stitch markers, help keep track of row patterns and wave peaks. A yarn needle is necessary for weaving in the ends to give your table runner a neat finish.
Measuring tools, like a tape measure, are useful to ensure the table runner matches your table size. Checking dimensions periodically helps maintain the desired length and width.
Creating a comfortable workspace is also important. Good lighting, a cozy environment, and minimal distractions will make your crochet experience more enjoyable and productive.
Step-by-Step Instructions
Start the Making Waves table runner by creating the foundation chain. The number of chains will determine the width of your table runner, so ensure it fits your intended table size.
The first row usually involves a combination of single crochet and double crochet stitches. This establishes the initial wave effect that will continue throughout the project.
As you progress, you will alternate increases and decreases in specific stitches to form the characteristic waves. Carefully follow the pattern to maintain symmetry and consistency in the wave design.
Continue crocheting row by row, measuring periodically to ensure the table runner maintains the correct dimensions. Consistency in stitch tension is key to keeping the waves even.
Once the desired length is reached, add a border to give the Making Waves table runner a polished look. This border can be simple or decorative, depending on your preference.
Finally, weave in all loose ends using a yarn needle. Taking care to hide the ends neatly ensures durability and enhances the visual appeal of your completed table runner.
Tips for Customizing Your Table Runner
Customizing the Making Waves table runner allows you to make it uniquely yours. Start by selecting colors that complement your table and home decor. Multiple shades can add depth and visual interest.
Experimenting with yarn textures can also create a unique look. Mixing cotton with linen or silk yarns can produce a sophisticated and textured wave effect.
Adjusting the size is another customization option. By increasing or decreasing the number of foundation chains or rows, you can make your table runner fit any table, from a small coffee table to a large dining table.
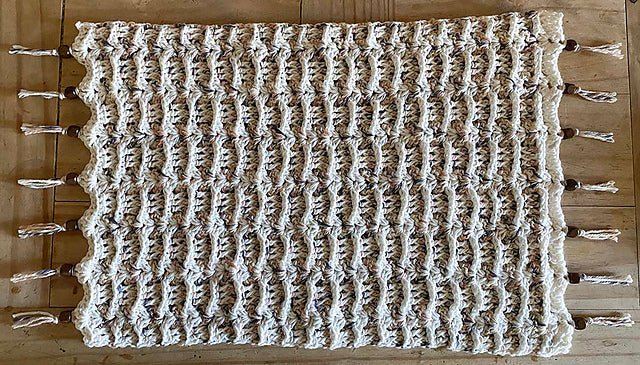
Decorative elements like fringe, tassels, or beads can add personality to your Making Waves table runner. Ensure these additions are securely attached to maintain the runner’s functionality.
Consistent tension and stitch accuracy are essential for a professional finish. Even slight variations can affect the appearance of the waves, so take your time and pay attention to each stitch.
Finally, gifting your handmade table runner is a meaningful way to share your craft. The Making Waves table runner makes a beautiful, personalized gift that shows thoughtfulness and creativity.
Q: Can beginners make the Making Waves table runner?
A: Yes, beginners can create this table runner. While it may require some practice, careful attention to instructions and consistent tension make it achievable.
Q: What yarn is recommended for the Making Waves table runner?
A: Cotton yarn is ideal due to its durability, smooth texture, and ease of care, though other yarns can be used for different effects.
Q: How long does it take to finish the Making Waves table runner?
A: Completion time varies depending on skill level and size, generally taking several days of dedicated crochet work.
Q: Can the colors be customized?
A: Absolutely. Choosing gradient or complementary colors can enhance the wave pattern and match your home decor.
Q: How do I care for the table runner?
A: Follow the yarn manufacturer’s instructions. Cotton yarn can usually be hand-washed or machine-washed gently and laid flat to dry.
Q: Can the table runner size be adjusted?
A: Yes, by adding or reducing foundation chains or rows, you can create a table runner suitable for any table size
In this article, we have explored how to crochet the Making Waves table runner step by step. From understanding the pattern and gathering materials to following the instructions and customizing your project, you now have the tools to create a beautiful, wave-inspired table runner.
This project combines creativity, functionality, and skill-building, making it perfect for both personal use and gifting. By paying attention to detail, practicing patience, and experimenting with colors and textures, you can achieve a stunning result that will impress family and friends.
We encourage you to share your experience, offer suggestions, and leave feedback. Your opinions help improve future projects and inspire creativity in the crochet community. The Making Waves table runner is not just a craft—it’s a piece of art that reflects your personal style and dedication.