
A Granny Square Tutorial is one of the most searched topics among crochet beginners and even experienced crafters who want to expand their skills. The granny square is a classic design that has stood the test of time because of its simplicity, versatility, and endless creative possibilities. Whether you are just learning how to crochet or looking to create a meaningful handmade project, this tutorial will guide you step by step through everything you need to know.
The beauty of a granny square lies in how it combines tradition and modern creativity. It is not just a square piece of crochet; it is a building block for countless projects like blankets, scarves, bags, tops, and even home décor. By following a Granny Square Tutorial, you can easily learn the basic stitches and techniques that can later be applied to larger, more complex creations.
Another reason why the granny square tutorial is so popular is because it allows you to use up leftover yarn. Even small pieces of yarn can be turned into colorful squares that, when joined together, create something truly beautiful. This makes it a sustainable craft and a perfect way to reduce waste while practicing your crochet skills.
The Basics of Granny Squares
To begin with, every Granny Square Tutorial starts with a foundation. The most traditional version begins with a small loop or chain ring, which serves as the center of your square. From there, you build outward using clusters of stitches that gradually expand the design.
The fundamental stitches you need to know are the chain stitch, slip stitch, and double crochet. These are simple but essential techniques that form the foundation of almost every granny square. Once you master them, you will find that creating squares becomes second nature.
One key point that many tutorials emphasize is tension. Keeping your stitches even ensures that your squares remain uniform in size. Without consistency, joining your squares later can become difficult. Practicing even tension early in your crochet journey will save you a lot of time in the future.
Color choice is another exciting part of making granny squares. You can opt for classic combinations, bold contrasts, or soft pastel tones depending on the project you have in mind. Following a Granny Square Tutorial gives you the freedom to experiment and develop your own unique style.
Granny squares are also an excellent introduction to pattern reading. Many crochet guides use symbols or abbreviations that might seem confusing at first. However, once you understand the structure of a granny square, those patterns become much easier to follow.
Most importantly, granny squares offer instant satisfaction. Unlike larger projects that may take weeks, you can finish a single square in a short time. This quick result motivates beginners to keep going and build their confidence in crochet.
Step-by-Step Guide to Crochet a Granny Square
When following a Granny Square Tutorial, it’s important to go step by step. First, you start with a slip knot and chain four to six stitches, then join them with a slip stitch to form a ring. This tiny circle is the foundation of your square.
The next step is to create your first cluster of double crochets. Typically, three double crochets form one cluster, separated by chain stitches. These clusters are repeated around the ring, forming the initial round of your granny square.
After completing the first round, you move on to building corners. Corners are formed by working multiple clusters into the same space, separated by chains. This technique ensures that the square expands evenly as you add more rounds.
Each round builds upon the last, creating a larger square with each repetition. The beauty of this process is its rhythm: chain, double crochet, slip stitch, and repeat. Once you find the flow, crocheting granny squares becomes both relaxing and rewarding.
Changing colors is another fun aspect of the tutorial. You can switch yarn colors at the beginning of a new round to add contrast and vibrancy to your design. A tip many crafters recommend is weaving in the ends as you go to avoid having too much finishing work later.
Finally, you continue adding rounds until your granny square reaches the desired size. Some people prefer small squares that are later joined, while others create large squares that serve as entire projects themselves. This flexibility is part of what makes the granny square tutorial so enjoyable.
Creative Ways to Use Granny Squares
One of the most exciting parts of any Granny Square Tutorial is discovering how versatile these little squares can be. Traditionally, they are joined to form blankets, but their uses go far beyond that.
You can create beautiful cushion covers by joining just a few squares. The effect is both cozy and stylish, giving your home a handmade touch. Bags made from granny squares are also very popular because they are lightweight, colorful, and practical.
Clothing is another creative use. From vests and tops to dresses, granny squares can be arranged in endless combinations to create wearable art. This is where choosing your color palette carefully makes a big difference.
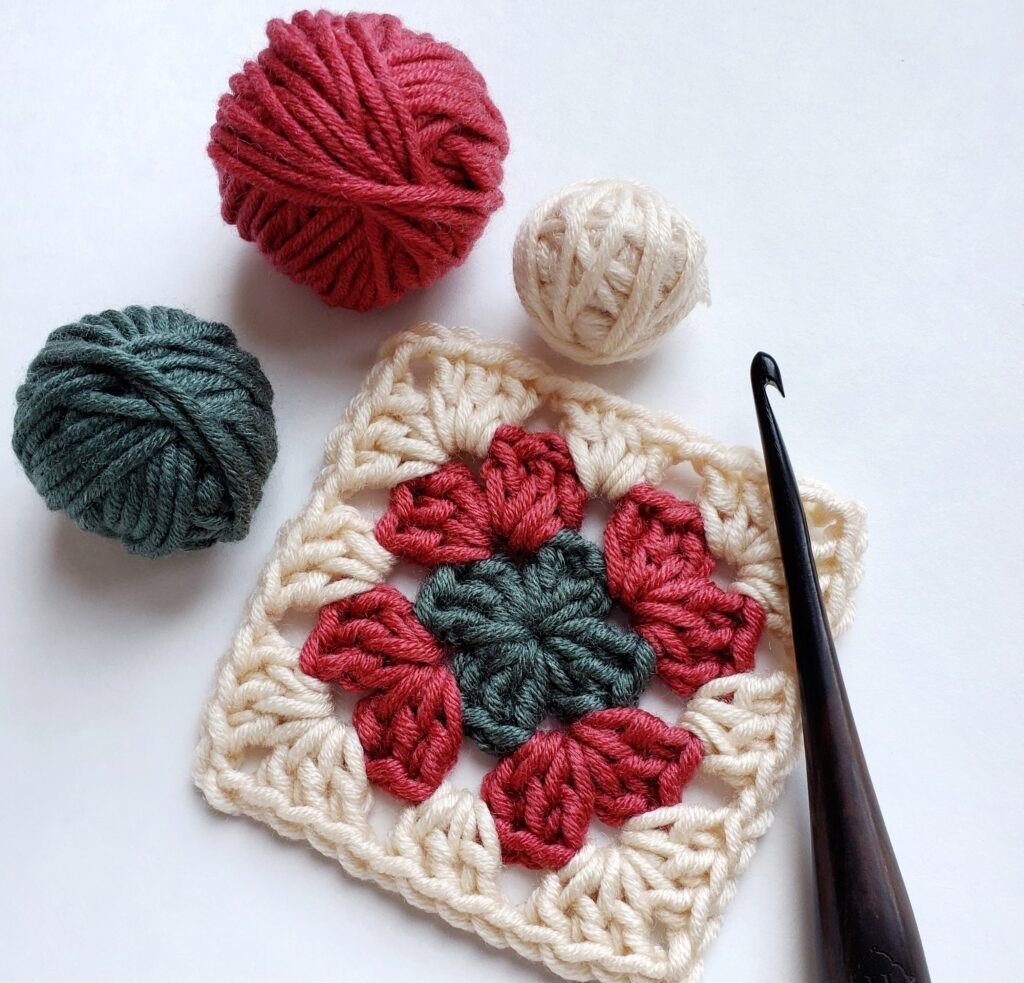
Granny squares are also great for seasonal projects. For example, you can make Christmas-themed squares using red, green, and white, then turn them into festive decorations. Similarly, pastel tones are perfect for spring or Easter-inspired designs.
Home décor items like table runners, coasters, and wall hangings are also common projects. These small creations add charm to any room and make excellent gifts. Handmade gifts are always appreciated, and granny squares make it easy to create something personal and unique.
Lastly, granny squares are perfect for practicing new stitches. Once you master the basics, you can experiment with textured stitches, lace patterns, or even mix techniques. The Granny Square Tutorial gives you a solid base to grow your creativity.
Tips for Joining and Finishing Granny Squares
The final part of any Granny Square Tutorial is learning how to join and finish your squares. This step is just as important as making the squares themselves.
One popular joining method is the whip stitch, where you sew squares together with a tapestry needle. It’s simple and creates a neat finish. Another method is the slip stitch join, which uses your crochet hook to connect the edges.
For a more decorative look, many crafters use the join-as-you-go technique. This allows you to attach each square directly while crocheting the last round, saving time and adding a unique design element.
Blocking is another finishing step often recommended. By wetting and shaping your granny squares, you ensure they are perfectly aligned and flat. This makes the final project look professional and polished.
Don’t forget about weaving in your yarn ends. Leaving loose threads can make your project look messy and even cause it to unravel over time. Taking a few minutes to secure them properly ensures your work lasts.
Adding borders is a great way to complete your project. A simple single crochet border gives a clean edge, while a scalloped or shell border adds elegance. Borders also help unify the design when working with multiple colors.
Finally, remember that finishing is part of the creative process. How you choose to join and border your granny squares can completely transform the final look of your project.
about Granny Square Tutorial
What is the easiest granny square for beginners?
The classic granny square with simple clusters of double crochets is the easiest for beginners. It requires only a few basic stitches and is very forgiving.
How many granny squares do I need for a blanket?
The number depends on the size of your blanket and squares. For a small throw, you may need around 40 to 60 squares, while larger blankets can require 100 or more.
Can I make granny squares with any yarn?
Yes, but medium-weight yarn is recommended for beginners. It’s easier to handle, and the stitches are more visible.
Do I need to block every granny square?
Blocking is optional but highly recommended if you want your squares to be uniform and professional-looking.
What can I make with just one granny square?
A single square can be turned into a coaster, a pot holder, or even the centerpiece of a bag. Larger squares can be used as pillow covers or wall art.
How do I change colors without leaving loose ends?
The best way is to change colors at the beginning of a new round and weave in the ends as you go. This keeps your project neat and secure.
In this Granny Square Tutorial, we explored the basics of creating granny squares, step-by-step instructions, creative uses, and important finishing techniques. We also covered common questions to help you get started with confidence.
The granny square remains a timeless crochet project because it is simple, versatile, and endlessly creative. Whether you make blankets, clothing, or home décor, these squares give you a foundation to explore your own artistic style.
Now that you know the essentials, I’d love to hear from you. What kind of projects are you planning to make with your granny squares? Please share your honest opinion and suggestions so we can continue improving and inspiring each other.