
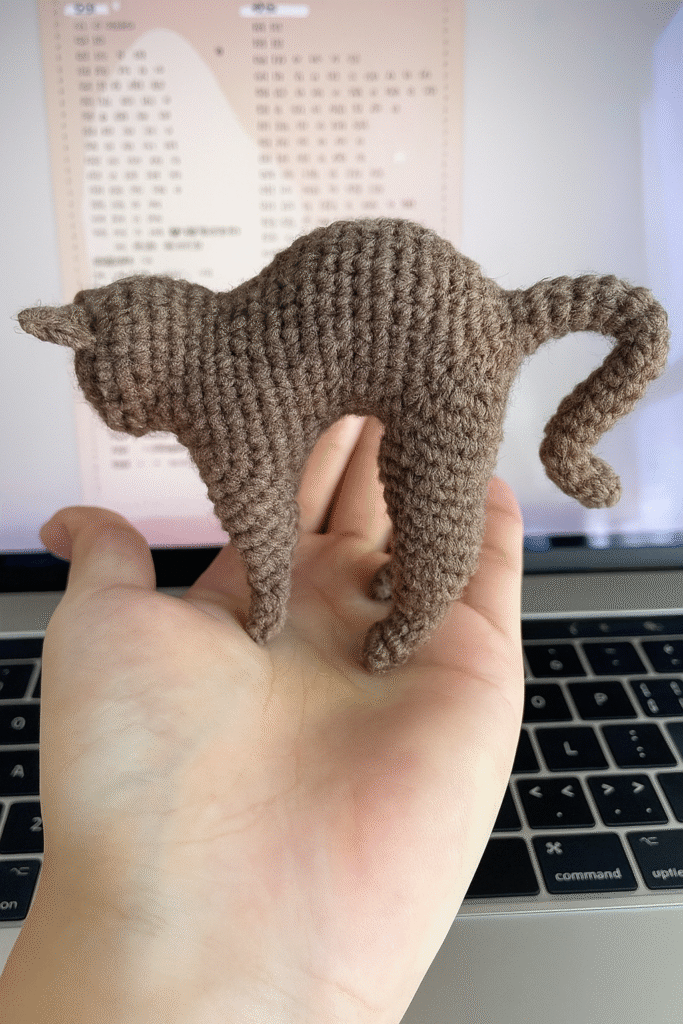
If you’re looking for a charming and creative way to express your love for crochet, the Amigurumi Crochet Cat Pattern is one of the most delightful projects you can make. This adorable handmade cat is not only fun to create but also brings warmth, personality, and joy to any home. Whether you’re a beginner or an experienced crocheter, crafting your own amigurumi cat is a satisfying experience that combines art, skill, and imagination.
The world of amigurumi has captured the hearts of crafters around the globe. The term, which originates from Japan, literally means “crocheted or knitted stuffed toy.” The Amigurumi Crochet Cat Pattern is especially popular because cats symbolize comfort, companionship, and playfulness — making them perfect subjects for crochet designs. Each handmade cat has its own personality, depending on your choice of yarn, color, and accessories.
Before diving into the steps and tips, it’s important to understand that creating an Amigurumi Crochet Cat Pattern is not just about following stitches. It’s about storytelling through yarn. Every curve, whisker, and tail stitch represents care and creativity. The beauty of amigurumi lies in its simplicity — a small hook, some yarn, and a lot of love can bring your cat to life.
Understanding the Basics of Amigurumi Crochet Cat Pattern
When beginning your journey with an Amigurumi Crochet Cat Pattern, it’s crucial to grasp the fundamental techniques that make amigurumi distinct. Unlike traditional crochet projects, which often focus on flat pieces like blankets or scarves, amigurumi involves working in the round to create 3D shapes. This method allows you to sculpt your yarn into adorable creatures and characters with personality.
Start by choosing the right yarn and hook size. For most amigurumi cat patterns, medium-weight cotton or acrylic yarns are ideal. Cotton yarn provides a clean, firm stitch definition, which is great for shaping your cat. Acrylic yarn, on the other hand, offers flexibility and softness — perfect if you want a cuddly toy for children. The hook size should generally be smaller than what’s recommended for your yarn to ensure tight stitches that hold the stuffing well.
The magic ring, or adjustable ring, is another key technique for the Amigurumi Crochet Cat Pattern. This method allows you to start crocheting in a closed circle, avoiding gaps in your work. After that, you’ll use basic stitches like single crochet (sc), increase (inc), and decrease (dec) to shape the cat’s body, head, legs, and tail. These simple stitches are the foundation of nearly every amigurumi project.
Stuffing your amigurumi cat correctly is also vital. Polyester fiberfill is the most common choice because it’s lightweight, washable, and easy to manipulate. The stuffing should be firm enough to hold the shape but not so tight that it distorts your stitches. Proper stuffing gives your Amigurumi Crochet Cat Pattern a professional and polished look.
Safety eyes and embroidery details bring personality to your cat. You can choose between plastic safety eyes for a realistic touch or embroider the eyes with yarn for a safer option, especially if the toy is for small children. Add small whiskers, a cute nose, or even a tiny scarf to give your cat its own identity.
Finally, assembling all the parts carefully ensures your creation looks balanced and symmetrical. Use a tapestry needle to sew the limbs and head securely. Take your time aligning each piece, as this step defines the final appearance of your amigurumi crochet cat.
Step-by-Step Guide to Creating an Amigurumi Crochet Cat
Once you understand the basics, it’s time to start creating your Amigurumi Crochet Cat Pattern. Begin with the head, as it often sets the tone for the entire project. Start with a magic ring and gradually increase your stitches to form a round shape. As you move up, remember to stuff the head evenly. Insert the eyes before closing off the top, so they sit perfectly centered.
The body of the amigurumi cat is usually crocheted separately. Most patterns use a cylindrical or slightly pear-shaped form to give your cat a realistic silhouette. Use consistent tension throughout your stitches, and remember to stuff the body gradually as you go — this helps maintain an even shape.
Next, work on the legs and arms. These are typically made in pairs and can either be attached later or crocheted directly onto the body for a seamless design. Keeping the proportions right is key; smaller limbs create a cute, chibi-style cat, while longer ones give a more elegant appearance.
The ears are small but crucial details in any Amigurumi Crochet Cat Pattern. Triangle-shaped ears are most common, but you can adjust their size and curve for different styles. Once sewn onto the head, they immediately give character and expression to your cat.
Don’t forget the tail! It adds personality and balance. Some crocheters like to make the tail flexible with a wire inside, but for safety, it’s best to use yarn alone. Curl the tail slightly for a playful look or keep it straight for a relaxed vibe.
When all parts are assembled, use embroidery to add finishing touches. A little pink nose, a few black whiskers, or even a small bell around the neck can transform your cat into something truly special. This is where your creativity shines in your amigurumi crochet cat project.
Creative Ideas and Customization for Your Crochet Cat
One of the best parts of making an Amigurumi Crochet Cat Pattern is the freedom to customize. No two cats need to look alike — you can change colors, sizes, and styles to match your personality or gift recipient.
Consider experimenting with color combinations. A classic gray or black cat looks sophisticated, while pastel tones give a soft and dreamy effect. You can even make a calico or tabby pattern by switching yarn colors mid-project. Using variegated yarns can also produce interesting textures and effects without the need to change yarn frequently.
Accessories can enhance your amigurumi cat and make it more unique. Add a tiny bowtie, a small fish toy, or a crocheted blanket. These details make your creation stand out and give it character. Many crocheters enjoy making themed cats — for example, a Halloween cat with a witch hat or a Christmas cat wearing a festive scarf.
If you’re feeling adventurous, try different yarn textures. Fuzzy or chenille yarns give your cat a plush, soft look, while standard cotton keeps it sleek and defined. Just remember that different yarn types can affect stitch size and pattern measurements, so adjust accordingly.
Another creative idea is to make a family of cats in different sizes. Using the same Amigurumi Crochet Cat Pattern, simply switch hook and yarn sizes to create a mother cat, kittens, or even a big fluffy tomcat. This makes a beautiful display or a perfect handmade gift set.
Finally, don’t forget to personalize your amigurumi cat with emotions. A smiling face, sleepy eyes, or a surprised expression adds life to your creation. Small embroidered details can completely change the mood of your cat, making each one truly one-of-a-kind.
Tips for Perfecting Your Amigurumi Crochet Cat Pattern
Even the most skilled crocheters can benefit from small tips that make a big difference. When working on your Amigurumi Crochet Cat Pattern, pay attention to consistency. Uneven stitches or varying tension can distort the final shape. Practicing a few rounds before starting the actual project helps achieve even tension throughout.
Use stitch markers generously. Since amigurumi is worked in continuous rounds, it’s easy to lose track of your stitch count. A marker helps you identify the beginning of each round and maintain accuracy in your pattern.
If you’re new to amigurumi, don’t rush the process. Take breaks between sewing and stuffing parts to avoid hand fatigue. Crocheting small pieces can be intricate, so patience is key.
Lighting also matters. Working in a well-lit space helps you see your stitches clearly, especially when using darker yarns. This small detail can significantly improve your experience and final result.
When sewing the parts together, use a yarn needle and matching thread for a neat finish. Invisible stitches or whip stitches are ideal for joining pieces seamlessly.
Lastly, always finish with a secure knot and weave in your ends carefully. This ensures that your amigurumi crochet cat stays intact and durable for years to come.
About Amigurumi Crochet Cat Pattern
Q1: What yarn is best for making an Amigurumi Crochet Cat Pattern?
Cotton yarn is ideal for defined stitches and structure, while acrylic yarn offers a softer and more flexible finish. Both work well depending on your desired texture.
Q2: Can beginners make an Amigurumi Crochet Cat?
Yes! The Amigurumi Crochet Cat Pattern is beginner-friendly, especially if you start with simple designs using basic stitches like single crochet and increase/decrease.
Q3: How long does it take to finish an amigurumi cat?
It usually takes between 5 to 10 hours, depending on the size, complexity, and your crochet speed.
Q4: Is it safe for children?
Yes, as long as you use embroidered features instead of plastic safety eyes and secure all parts firmly to prevent small pieces from coming loose.
Q5: Can I sell my finished amigurumi cats?
Absolutely! Handmade amigurumi crochet cats are popular at craft fairs and online stores. Just make sure to credit the original pattern creator if required.
Creating an Amigurumi Crochet Cat Pattern is more than just a hobby — it’s a heartwarming way to express creativity and make something special. From learning the basics to customizing your cat’s personality, every stitch tells a story of patience, care, and imagination. Whether you’re crafting for fun, gifts, or business, the joy of bringing a handmade cat to life is unmatched.
Now that you’ve learned all the essential tips, techniques, and creative ideas, I’d love to hear your thoughts! Share your honest opinion about this article and tell me what kind of amigurumi projects you’d like to explore next. Your suggestions and experiences help keep this wonderful craft community growing!