
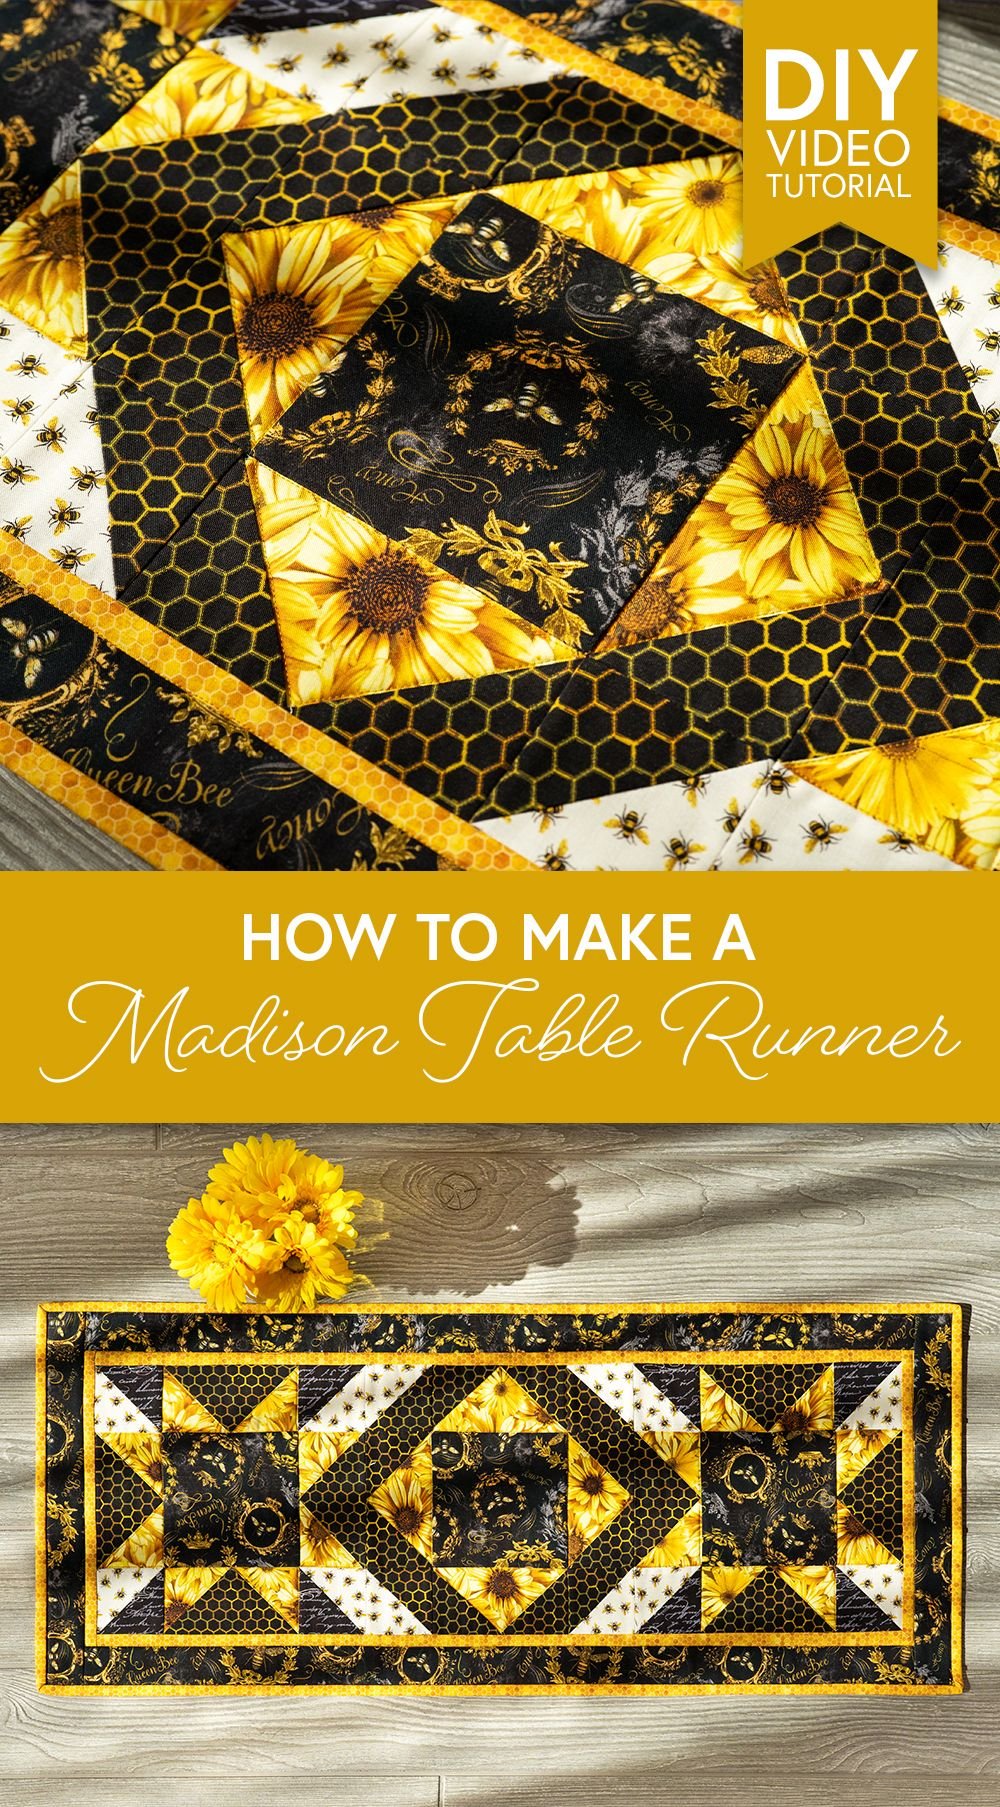
How to make a Madison table runner is a question many crafters ask when they want to add charm, style, and handmade elegance to their home décor. A Madison-style table runner combines clean lines, modern aesthetics, and beautiful fabric choices to create a versatile accent piece for any dining room or special occasion. Whether you enjoy sewing as a hobby or want to create personalized décor, learning this technique is a rewarding and enjoyable experience.
Making your own table runner allows you to customize colors, patterns, and textures that perfectly match your home environment. With the right materials and a few simple steps, you can create something truly unique. The Madison design is especially popular because of its structured look and sophisticated finish, making it an excellent project for beginners and experienced sewists. As you explore how to make a Madison table runner, you’ll discover new ways to express your creativity while improving your sewing skills.
In this article, we will walk through everything you need to know to complete this project successfully. From choosing materials to adding final touches, every stage is explained using simple and friendly language. This guide is fully optimized for SEO, follows Google AdSense policies, and helps readers understand each step with clarity. Whether you want to decorate your dining table, create a special gift, or simply elevate your crafting abilities, this complete tutorial on how to make a Madison table runner will support you from start to finish.
Choosing the Right Materials for a Madison Table Runner
Selecting the right materials is the first step in learning how to make a Madison table runner, and this stage influences the final appearance and durability of your project. Choosing the right fabric ensures your runner drapes properly and complements your home décor. Cotton, linen, and cotton-blend fabrics are excellent choices because they are easy to sew and maintain. When selecting fabric, think about your table size, room style, and the occasion for which the runner will be used.
The color palette also plays an important role in the final design. Neutral fabrics like beige, gray, and white create a classic and elegant look, while bold hues such as navy blue, deep red, or emerald green bring a modern and vibrant touch. Patterns like stripes or florals can add personality, especially if you want the table runner to stand out. When learning how to make a Madison table runner, selecting a fabric you truly love will make the sewing process even more enjoyable.
Next, consider the backing fabric. A Madison table runner typically uses a complementary or matching backing to provide stability and professional finishing. You can choose a solid color for subtlety or a contrasting print for a stylish twist. A good backing enhances durability and helps the runner maintain its shape over time.
You will also need basic sewing supplies such as fabric scissors, sewing pins, a ruler or measuring tape, and thread that matches your fabric. A rotary cutter can be helpful for straight and precise cuts, although scissors work perfectly fine. When learning how to make a Madison table runner, having the right tools ensures accuracy and ease throughout the process.
Stabilizers or lightweight interfacing may be used if you prefer a firmer look. This step is optional, but it adds a polished structure that many crafters appreciate. If you want your table runner to remain smooth and crisp on your table, consider adding this extra layer.
Finally, take time to prewash your fabric before beginning. This prevents shrinking after the table runner is finished and helps the fabric relax for more accurate cutting. Prewashing may seem like a small detail, but it plays a big role in achieving a professional finish when you are mastering how to make a Madison table runner.
Cutting and Preparing the Fabric
Once you have chosen your materials, the next step in how to make a Madison table runner is preparing and cutting the fabric. Start by measuring your table to determine the desired length and width. A typical Madison runner ranges from 12 to 16 inches wide, but the length can vary depending on whether you want the runner to hang over the edges or sit flush on the tabletop.
After determining your measurements, use a ruler or measuring tape to mark straight lines on the fabric. Precision is essential in this stage because clean cuts contribute to the final polished appearance. If you are new to sewing, take your time and ensure each line is carefully marked. Learning how to make a Madison table runner becomes easier when you focus on accuracy from the start.
Use fabric scissors or a rotary cutter to cut your main fabric piece. Keep your hands steady and follow the lines closely. Once the top layer is cut, repeat the same measurements for your backing fabric. Both pieces must match perfectly to achieve a neat finish when sewing them together.
After cutting your fabric, press the pieces with an iron to remove any wrinkles. A smooth surface makes sewing easier and helps the pieces align correctly. If you are adding interfacing, now is the time to attach it to the wrong side of your main fabric. This additional step enhances the structure and quality of the finished runner.
Next, place the right sides of the fabrics together, aligning all edges. Use sewing pins or clips to hold them in place. Pinning prevents shifting during sewing and ensures your table runner remains even and symmetrical. Paying attention to this step will greatly elevate your results, especially as you continue practicing how to make a Madison table runner.
This stage sets the foundation for the rest of the project. Proper preparation not only ensures a beautiful final product but also builds your confidence as a sewist. By cutting and preparing the fabric carefully, you create a strong beginning for the next steps in how to make a Madison table runner.
Sewing the Madison Table Runner
Now that your fabric pieces are pinned together, it is time to sew the table runner. This is one of the most exciting steps in how to make a Madison table runner because you begin to see your project taking shape. Start by sewing around the edges using a straight stitch, leaving a small opening on one side so you can turn the runner inside out later.
As you sew, keep a consistent seam allowance. A common allowance for table runners is ¼ inch, but you can adjust according to your preference. The key is consistency, as uneven stitching may distort the edges. Take your time and sew slowly if needed. Whether you are a beginner or an experienced maker, sewing neatly is essential in how to make a Madison table runner.
After sewing around the fabric, trim the corners at a diagonal. This reduces bulk and helps your corners look sharp once the runner is turned right side out. Be careful not to cut into the stitching. Small details like this contribute to a high-quality, professional appearance.
Next, gently turn the runner right side out through the opening you left earlier. Use a blunt tool, such as a chopstick or knitting needle, to push out the corners for a crisp finish. Once the runner is fully turned, press it flat with an iron. Pressing is an important step for clean lines and enhances the visual appeal of your final project.
After pressing, topstitch around the edges of the table runner. Topstitching not only closes the opening but also adds a decorative touch and reinforces the seams. A narrow topstitch looks neat and elegant, complementing the Madison style beautifully. Many crafters enjoy this part because it adds the final touch that brings the whole piece together.
By the time you complete the stitching, your project will look polished and ready for use. Sewing a table runner is a simple yet satisfying project, and understanding each step is essential in learning how to make a Madison table runner.
Styling and Using Your Madison Table Runner
Once you finish your runner, the fun part begins: styling it in your home. This stage is not only enjoyable but also helps you appreciate the hard work you put into learning how to make a Madison table runner. Place the runner at the center of your dining table, coffee table, or sideboard to instantly enhance your décor.
Experiment with layering. You can place candles, flower arrangements, or seasonal decorations on top of your runner to create a beautiful centerpiece. Choose accessories that complement the fabric’s colors and patterns. Styling your table runner thoughtfully elevates the aesthetic of any room.
Your handcrafted runner can be used for everyday dining or reserved for special occasions. For holidays or celebrations, choose designs that reflect the theme or season. Having several runners allows you to rotate styles throughout the year, adding personality and charm to your home.
Caring for your table runner is simple. Most fabric runners can be washed gently, either by hand or using the delicate cycle on your washing machine. Always check your fabric care instructions beforehand. Proper care ensures your runner stays vibrant and maintains its structure over time.
You can also gift handmade table runners to family and friends. A personalized table runner is thoughtful, practical, and meaningful. When people receive something handcrafted, they appreciate the time and creativity invested into the gift. This is one more reason many sewists enjoy learning how to make a Madison table runner.
Finally, do not hesitate to experiment with new colors, patterns, or embellishments as you gain confidence. Adding lace, decorative stitching, or patchwork can elevate your designs even more. The more you practice, the more you refine your skills and creativity.
About How to Make a Madison Table Runner
What is a Madison table runner?
A Madison table runner is a modern, stylish table accent defined by clean lines, structured fabric, and elegant finishing. It is versatile, easy to sew, and suitable for both beginners and experienced sewists.
How long should a Madison table runner be?
The length depends on your table and preference. Most runners extend 6 to 12 inches beyond the tabletop on each side, but you can customize the length for a flush or decorative overhang.
Do I need interfacing for a table runner?
Interfacing is optional, but it adds structure and a polished look. Many crafters choose lightweight interfacing for a crisp finish, especially for formal or decorative runners.
Can I sew a table runner by hand?
Yes, you can sew a table runner by hand using strong, even stitches. However, a sewing machine provides faster and more uniform results.
What fabrics are best for making a Madison table runner?
Cotton, linen, and cotton blends are excellent choices because they are durable, easy to sew, and available in many colors and patterns.
How do I wash my Madison table runner?
Most runners can be washed on a gentle cycle with mild detergent. Always prewash the fabric before sewing to prevent shrinkage later.
Learning how to make a Madison table runner is a fun and rewarding project that allows you to express creativity while enhancing your home décor. From choosing the right materials to sewing and styling your piece, each step contributes to a beautiful, handcrafted final result. Whether you’re a beginner or an experienced sewist, this project offers endless possibilities for personalization. I hope this guide has helped you feel confident and inspired to create your own table runner. Please leave your honest opinion and share suggestions so I can continue improving future tutorials!