
Lace-Trimmed Cloth Napkins Tutorial is a charming and timeless craft that combines elegance, practicality, and personal expression. When you add delicate lace to simple fabric napkins, they instantly transform into beautiful table accents that elevate any dining experience. Whether you love sewing, enjoy home décor projects, or want to create handmade gifts, this Lace-Trimmed Cloth Napkins Tutorial will guide you through every step with ease.
Crafting your own napkins allows you to choose fabrics, lace patterns, and colors that match your style perfectly. This project is not only satisfying but also beginner-friendly, making it ideal for anyone looking to explore sewing or enhance their handmade home accessories. As you follow this Lace-Trimmed Cloth Napkins Tutorial, you will discover how small details—like lace edges—bring warmth and personality to your table settings.
In this article, you will learn how to prepare your materials, cut your fabric, attach lace in different styles, and finish your napkins beautifully. Throughout the tutorial, the emphasis will be on achieving clean, professional results while keeping the process simple and enjoyable. Let’s begin this inspiring journey into handmade elegance.
Choosing Materials for Your Lace-Trimmed Napkins
Selecting the right materials is one of the most important parts of this Lace-Trimmed Cloth Napkins Tutorial. The quality of your fabric and lace will determine the durability, softness, and overall appearance of your finished napkins. Choosing thoughtfully ensures your project turns out beautifully.
When selecting fabric, cotton and linen are highly recommended because they are absorbent, washable, and long-lasting. These fabrics also hold their shape well and provide a smooth surface for attaching lace. Think about your dining style: soft neutrals offer a classic look, while bright colors create a vibrant table presence.
Lace comes in many varieties, from delicate crochet lace to wider decorative trims. Choose a lace that complements your fabric without overpowering it. Narrow lace creates a subtle, elegant border, while wider lace adds a more decorative and vintage appearance. Always choose lace with a gentle drape so it sits nicely around the napkin edges.
Before starting, wash and iron both the fabric and the lace. This prevents shrinkage later and helps your pieces lie flat for accurate cutting and sewing. Proper preparation is especially important in a Lace-Trimmed Cloth Napkins Tutorial, where precision plays a key role in achieving professional results.
You’ll also need basic sewing tools: scissors, pins or clips, a sewing machine or hand-stitching needles, and matching thread. A rotary cutter and mat can help you cut clean, even squares. Gathering these materials in advance makes the process smooth and enjoyable.
Once your materials are ready, you are prepared to begin crafting beautiful napkins that reflect your taste and creativity. The rest of this Lace-Trimmed Cloth Napkins Tutorial will guide you step-by-step through the sewing process.
Cutting and Preparing the Fabric
Cutting the fabric evenly is essential for well-proportioned napkins. Most cloth napkins are cut into squares measuring 16 to 20 inches, depending on the size you prefer. A square shape allows the lace to frame the napkin beautifully and ensures a balanced final design.
Lay your ironed fabric flat and use a ruler or grid board to measure your squares accurately. A rotary cutter helps maintain sharp, straight edges, which is important when working through this Lace-Trimmed Cloth Napkins Tutorial. Cutting carefully at this stage will result in neatly finished napkins.
After cutting, press the edges of each square with an iron. Fold the raw edge about ¼ inch inward, press, then fold again to create a clean double-fold hem. This hem not only hides raw edges but also provides a sturdy base for attaching lace later in the tutorial.
Pin or clip your folded hems to keep them in place. Taking your time during preparation reduces mistakes and ensures your napkins look polished. Proper pressing also helps keep your napkins square and flat when it’s time to sew.
If you plan to use wider lace that covers the hem completely, you can skip double-folding the edges and simply fold once. The lace will hide the raw edge while still giving your napkin a clean finish. This choice depends on your lace style and the look you want to achieve.
Once your napkin pieces are fully prepared, you are ready for the exciting step of adding lace. In this Lace-Trimmed Cloth Napkins Tutorial, the lace-sewing process is where your napkins truly begin to take shape and show their decorative beauty.
How to Attach Lace to Your Napkins
Attaching lace is the heart of this Lace-Trimmed Cloth Napkins Tutorial, and it’s the step that gives your napkins their elegant and personalized appearance. Lace can be attached in several ways, and each style creates a unique effect depending on the look you want.
The simplest method is to sew lace directly onto the hemmed edge of your napkin. Position the lace so its top edge aligns with the inside edge of the hem. Pin it in place around the napkin, ensuring it stays straight and evenly spaced.
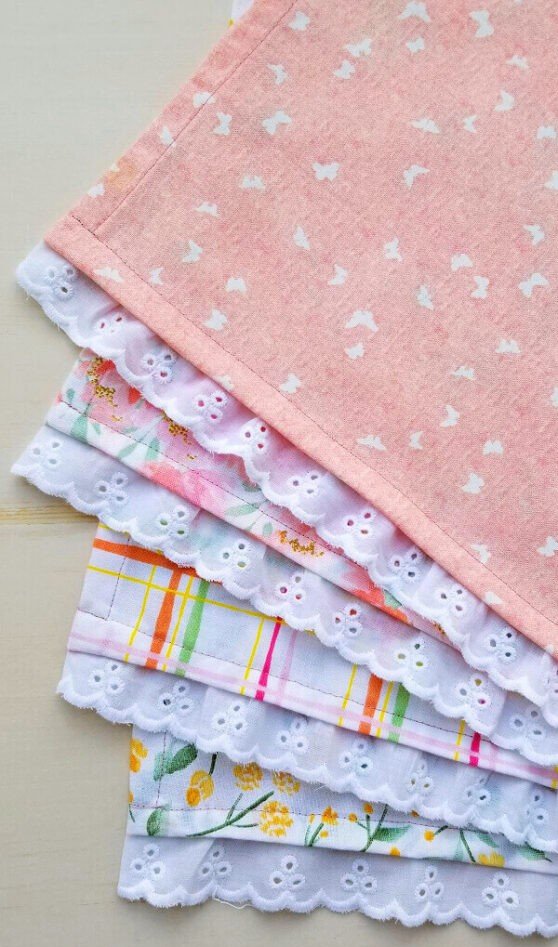
If your lace has a decorative scalloped edge, place it so the scallops extend outward from the napkin. This creates a delicate and eye-catching border. When using lace like this, sew along the straight top edge to secure it firmly in place.
For wider lace trims, you may choose to overlay the lace onto the napkin fabric. This technique allows more of the lace pattern to show and creates a more dramatic design. Carefully smooth the lace as you pin it, making sure it lies flat and doesn’t pucker.
When sewing lace, use a straight stitch and take your time, especially around the corners. Turning corners neatly helps your napkins look professionally finished. Trim excess lace at the ends and overlap neatly to avoid bulk.
Hand-sewing lace is also an option for those who prefer a softer, more artisanal finish. Using small, even stitches creates beautiful results and allows for greater control, especially when working with delicate lace. This slower method reflects the handmade spirit of this Lace-Trimmed Cloth Napkins Tutorial.
After attaching the lace, give your napkins a final press with a warm iron. This helps flatten the lace and fabric together, giving them a crisp, finished appearance that enhances your table décor beautifully.
Finishing Touches and Care Tips
Adding the finishing touches is an important step in this Lace-Trimmed Cloth Napkins Tutorial. These small details ensure your napkins look polished, durable, and ready for everyday use or special occasions.
One helpful technique is topstitching around the napkin edges. This reinforces the hem and keeps the lace securely in place. Topstitching also creates a clean, structured look that adds to the napkin’s overall beauty.
If your lace is especially delicate, consider washing your napkins by hand or using a gentle machine cycle. Mild detergent helps preserve the fibers and keeps your lace looking bright and fresh. Taking good care of your napkins will ensure they last for years.
You may also want to create a full matching set of napkins. Making multiple pieces at once saves time and ensures consistency. A coordinated set of handmade napkins makes a lovely gift for weddings, housewarmings, or birthdays.
Another creative option is mixing different lace styles on each napkin while keeping the fabric consistent. This creates a charming, eclectic look that still feels harmonious. Your dining table will feel warm, welcoming, and uniquely decorated.
Storing your napkins properly helps maintain their beauty. Keep them folded neatly in a drawer or linen cabinet, or place them inside breathable bags to prevent dust. Avoid storing them in areas with excessive humidity to protect the lace.
With the finishing touches complete, your handmade napkins are ready to enjoy. This Lace-Trimmed Cloth Napkins Tutorial shows how simple materials and careful craftsmanship can create something truly elegant and functional for your home.
Lace-Trimmed Cloth Napkins Tutorial
What fabric works best for lace-trimmed napkins?
Cotton and linen are the most recommended materials because they are durable, washable, and easy to sew.
Should I prewash the fabric and lace before sewing?
Yes. Prewashing prevents shrinkage and keeps the final napkins looking neat and even.
Can I sew lace by hand instead of using a machine?
Absolutely. Hand-sewing produces beautiful results and offers more control with delicate lace.
How wide should my lace be for this project?
Narrow lace creates a subtle look, while wider lace adds a more decorative effect. Choose based on your personal style.
What napkin size is standard?
Most dinner napkins measure between 16 and 20 inches square.
Is this project beginner-friendly?
Yes. A Lace-Trimmed Cloth Napkins Tutorial is perfect for beginners because it uses simple techniques and basic sewing tools.
Can I mix fabrics or lace styles?
Yes. Mixing lace patterns creates unique and charming napkins while maintaining a cohesive set.
This Lace-Trimmed Cloth Napkins Tutorial showed you how to choose materials, prepare fabric, attach lace beautifully, and finish your napkins with care. Handmade napkins add elegance, warmth, and personality to any dining space. I hope this tutorial inspired you to create your own set and explore your creativity. Please leave a sincere opinion and share any suggestions you may have—I would love to hear your thoughts!