
Learning how to make a fabric bird is a delightful and creative project that allows you to turn simple scraps of fabric into charming handmade decorations. Whether you are an experienced crafter or a beginner exploring sewing for the first time, this project is a perfect way to express creativity, recycle materials, and make something truly personal. Fabric birds can be used as home décor, keychains, gifts, or even as ornaments for holidays and special occasions.
The beauty of making a fabric bird lies in its simplicity and versatility. You don’t need a sewing machine or professional skills to start. With just a few basic tools—like scissors, needle, thread, and fabric—you can create beautiful little birds in a variety of colors and styles. Each bird you make can be unique, reflecting your favorite colors, patterns, and textures. This craft project combines imagination, patience, and joy, making it a fulfilling experience for anyone who loves handmade creations.
In this detailed guide, we’ll walk through every step of how to make a fabric bird from start to finish. You’ll learn how to choose materials, cut and sew your pattern, stuff and shape the bird, and decorate it beautifully. By following these steps, you’ll gain confidence in hand sewing and create a lovely keepsake that adds warmth to your home or makes someone smile as a thoughtful gift.
Choosing the Right Materials for Your Fabric Bird
The first step in learning how to make a fabric bird is selecting the right materials. The quality and look of your finished bird depend greatly on the type of fabric and tools you choose. Picking the right fabric ensures your bird has the right texture, structure, and personality.
When choosing fabric, cotton is one of the best options because it’s easy to cut, sew, and shape. You can also experiment with linen, felt, or lightweight denim for different effects. Soft and flexible fabrics are perfect for beginners since they’re easier to handle. Avoid materials that are too slippery or thick, as they can be difficult to sew and turn inside out.
Next, you’ll need basic sewing supplies: a pair of sharp scissors, sewing pins, a hand-sewing needle, and matching thread. If you have a sewing machine, it can make the process faster, but hand sewing works perfectly fine for this project. You’ll also need some stuffing material—polyester fiberfill or cotton works great to give your bird a nice, full shape.
Patterns are another essential part of this project. You can draw a simple bird shape on paper or find a printable pattern online. A basic pattern usually includes two body pieces, a wing shape, and sometimes a small beak. Keeping the design simple helps you focus on clean stitches and neat finishing.
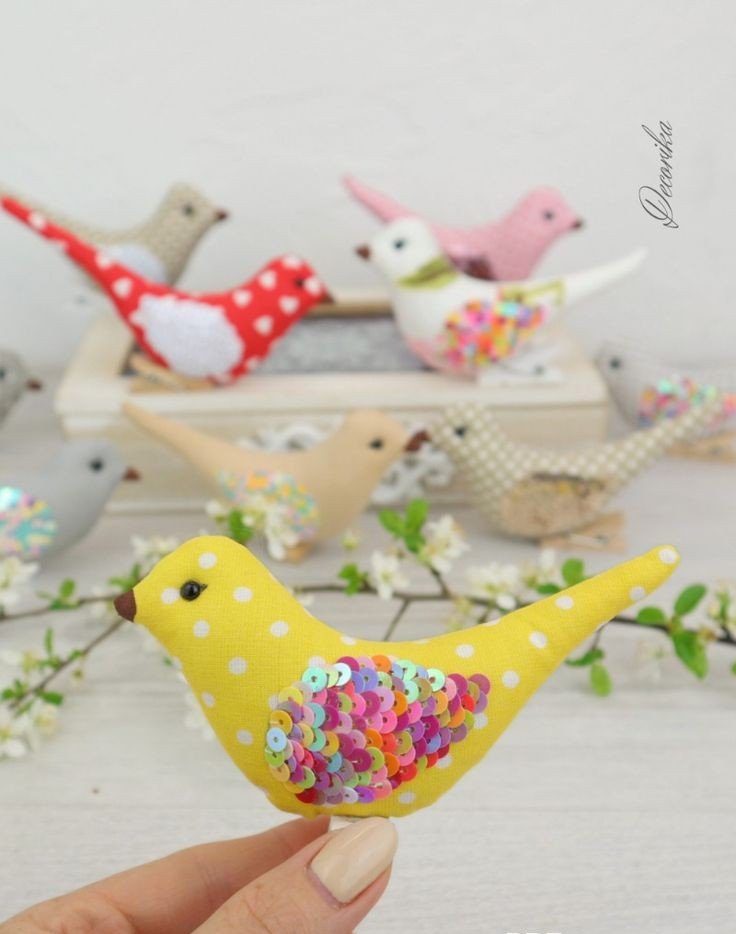
Finally, think about decorations. Buttons, beads, ribbons, or embroidery can all add personality to your fabric bird. Choosing small, coordinated embellishments helps make your bird look charming and professional. Remember, the goal is to express creativity while maintaining balance and beauty in the final piece.
Once your materials are ready, it’s time to move on to cutting and preparing the fabric pieces for sewing. This is where your bird begins to take shape, one careful step at a time.
Cutting and Preparing the Fabric Pieces
Now that you’ve gathered your materials, the next step in how to make a fabric bird is cutting and preparing your fabric pieces. Accuracy during this stage is key to ensuring that all parts fit together smoothly later on.
Begin by folding your fabric in half, with the right sides facing each other. This way, when you cut the bird pattern, you’ll automatically have mirrored pieces that align perfectly. Pin your paper pattern to the fabric securely so it doesn’t move while cutting. Use sharp scissors to carefully cut along the edges of your pattern.
You’ll typically need two main body pieces and two wings for each bird. If your design includes a beak or tail, cut those pieces as well. For a more colorful result, you can use different fabrics for the wings and body. This contrast adds charm and makes the finished bird more eye-catching.
Once the pieces are cut, remove the pattern paper and make sure all edges are smooth. At this point, you can also mark sewing lines using tailor’s chalk or a disappearing fabric marker, leaving a small seam allowance—usually about ¼ inch. These markings will guide your stitches and keep your bird’s shape consistent.
Before sewing, it’s a good idea to iron your fabric lightly. This helps flatten wrinkles and gives your project a clean, professional look. Pressing the fabric also makes stitching easier and more accurate.
If you plan to add embroidery or small decorative details, now is the perfect time to do so. Stitching on eyes or patterns before assembling the bird prevents any awkward sewing on curved, stuffed surfaces later. Small steps like these contribute greatly to a neat and charming finished product.
Once everything is ready and neatly prepared, you can move on to the most enjoyable part—stitching and assembling your adorable fabric bird.
Sewing and Assembling the Fabric Bird
The next stage in how to make a fabric bird is sewing the pieces together to bring your creation to life. This is where your little fabric bird begins to look real and three-dimensional.
Start by placing the two body pieces together, right sides facing each other. Use sewing pins to hold them securely in place. Begin stitching around the edges with small, even stitches, leaving a small opening—usually at the bottom or back—so you can turn the bird right side out later. A backstitch works well for hand sewing, as it’s strong and durable.
If you’re using a sewing machine, select a straight stitch and go slowly around the curves. The more carefully you sew, the smoother your bird’s shape will be. Once stitched, trim any excess fabric and snip small notches along curved edges to help the bird turn neatly without bunching.
Gently turn the bird right side out through the opening. Use a pencil or chopstick to push out the edges and shape the beak and tail if your design includes them. You’ll see the cute bird shape begin to appear as you smooth it out.
Next, stuff the body with fiberfill or cotton. Use small amounts at a time to avoid lumps. The goal is to achieve a firm but soft shape that holds its form. Be patient and distribute the stuffing evenly, especially around the head and tail.
Once you’re satisfied with the shape, close the opening with a ladder stitch or invisible stitch for a clean finish. This hand-sewn step is essential for giving your bird a polished look. After that, attach the wings using small stitches along the top edges, or add a few embroidery stitches for decoration.
Finally, sew on any embellishments such as buttons for eyes, beads, or tiny bows. Each detail adds personality and charm, transforming your fabric bird into a one-of-a-kind handmade treasure.
Decorating and Displaying Your Fabric Bird
The final step in how to make a fabric bird is decorating and displaying your creation. This is where you can let your imagination soar and personalize your bird to fit your style or home décor.
Start with the simplest decorations. You can embroider small patterns on the wings or body, such as flowers, lines, or dots. Using contrasting thread colors helps these designs stand out beautifully. If you prefer a minimalist look, even a few simple stitches around the edges can add elegance.
Adding eyes is a small detail that gives your bird life. You can use black beads, small buttons, or even a few stitches of dark thread. If you’re making a bird for children, avoid small detachable items for safety and use embroidered eyes instead.
For a festive or cozy touch, add accessories like ribbons around the neck or tiny felt hats. During the holidays, you can make a string of fabric birds and hang them on the Christmas tree or garland. They also make wonderful keychains, pincushions, or baby mobile decorations.
Consider using natural elements for display, such as branches, wooden stands, or rustic baskets. A few handmade birds perched together can create a warm and charming centerpiece for your home.
If you enjoy gifting handmade crafts, fabric birds make thoughtful presents. You can customize them with special fabrics or embroidered initials for a personal touch. Friends and family will appreciate the love and effort behind each piece.
By experimenting with colors, patterns, and decorations, you can create endless variations of these adorable birds. Each project teaches you new techniques and inspires fresh ideas for your next creation.
1. What fabric is best for making a fabric bird?
Cotton is the best choice because it’s soft, easy to sew, and holds its shape well. Felt is also a great option for beginners since it doesn’t fray and is simple to cut.
2. Can I make a fabric bird without a sewing machine?
Yes! You can sew everything by hand using basic stitches like backstitch or running stitch. Hand sewing gives your project a charming, handmade look.
3. What can I use to stuff my fabric bird?
Polyester fiberfill, cotton, or even fabric scraps work well. Make sure the stuffing is evenly distributed to keep the bird’s shape smooth.
4. How can I decorate my fabric bird?
Use embroidery, beads, buttons, ribbons, or small fabric appliqués. You can also use fabric paint to add details like feathers or patterns.
5. Are fabric birds suitable for children’s toys?
Yes, but ensure there are no small detachable pieces like beads or buttons. Use embroidered eyes and securely stitched parts to make them safe for kids.
6. Can I sell my handmade fabric birds?
Absolutely! Handmade fabric birds are popular at craft fairs and online marketplaces. Just make sure your products are neatly finished and photographed beautifully.
Now that you know how to make a fabric bird, you can create endless adorable and personalized decorations from simple materials. Each bird you make will carry your own creative touch and a sense of handmade warmth. Whether you’re sewing for fun, for gifts, or for home décor, this project is a rewarding and relaxing way to express creativity.
We hope this step-by-step guide inspired you to start your own collection of fabric birds. If you try this craft, please share your honest opinion and suggestions—we’d love to know what you thought and how your creation turned out!