
Learning how to make a crochet star pattern is one of the most delightful experiences for any crochet lover. Whether you’re a beginner or an advanced crafter, stars are a timeless motif that can be used for countless projects, from festive decorations to cozy blankets and stylish accessories. The beauty of a crochet star pattern lies in its simplicity and versatility — a perfect combination of creativity, texture, and warmth.
Crocheting stars allows you to explore a variety of stitches while creating something meaningful and decorative. These patterns can be made using different types of yarn, colors, and sizes to match your personal taste or project requirements. You can create delicate stars for a baby mobile, larger ones for holiday garlands, or even textured stars for coasters and appliqués. The crochet star pattern is not only enjoyable to make but also a great way to use up leftover yarn and practice new techniques.
In this article, we will explore everything you need to know about creating a crochet star pattern — from materials and techniques to ideas and customization tips. Each section is designed to guide you step-by-step, ensuring that you understand the fundamentals while inspiring you to make your own creative variations. Let’s begin this journey into the wonderful world of crochet stars!
Understanding the Basics of a Crochet Star Pattern
Before diving into your first project, it’s important to understand what makes a crochet star pattern special. At its core, a crochet star is created by working in the round, often beginning with a magic ring or chain circle. The pattern typically includes increases and decreases that form the star’s characteristic points.
The most common type of crochet star has five points, but you can also find or create patterns with six, seven, or even eight points. The number of points you choose will affect the overall shape and style of the star, giving you the freedom to design something unique. For example, a five-point star looks classic and symmetrical, while a six-point star often resembles a snowflake — perfect for winter decorations.
When choosing your yarn, consider the texture and weight. For delicate, airy stars, a lightweight cotton yarn works beautifully. For thicker, more solid stars, opt for a medium or bulky yarn. The crochet hook size should correspond to your yarn choice, typically ranging from 3mm to 5mm for smaller stars.
Another key aspect is stitch tension. Maintaining even tension ensures that each star point is the same size, giving your finished piece a polished look. Beginners might find it helpful to practice a few rounds before starting the final project.
Once you master the basic structure, you can experiment with different stitches such as single crochet, double crochet, treble crochet, or even textured stitches like popcorn or puff stitch. Each one will create a distinct appearance and feel, making your crochet star pattern truly your own.
Finally, remember that blocking your finished stars helps them maintain their shape. Simply pin them to a foam board, spray lightly with water, and let them dry. This final touch transforms your crochet stars from soft shapes into crisp, defined motifs ready to use or display.
Creative Ideas for Using Crochet Star Patterns
The beauty of the crochet star pattern lies in its versatility. Once you’ve made a few, you’ll discover endless ways to use them around your home or as thoughtful handmade gifts.
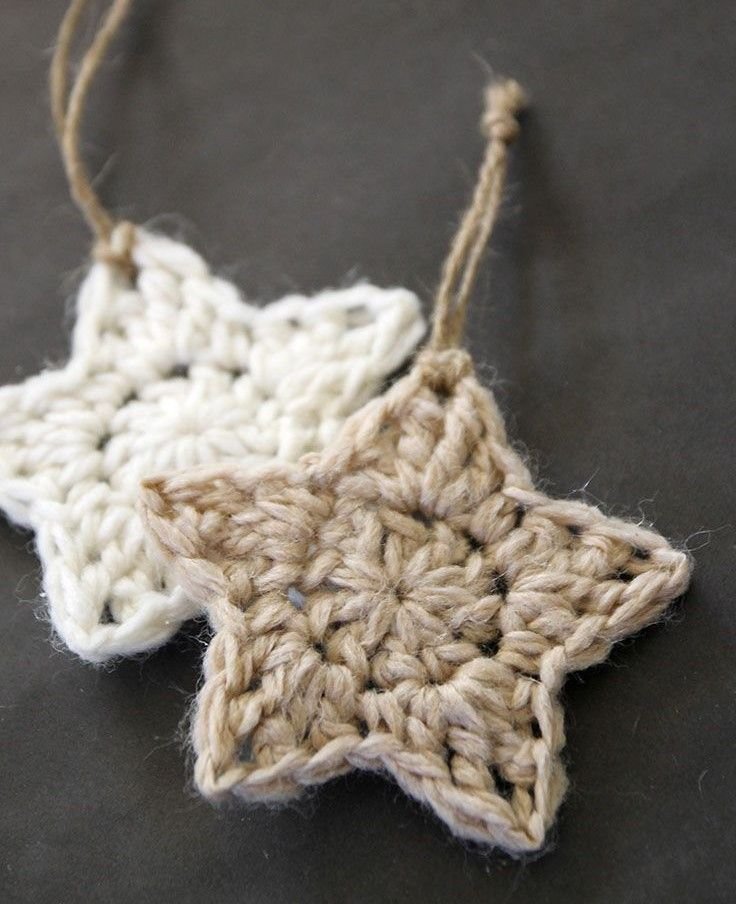
One popular option is creating Christmas ornaments. You can crochet stars in festive colors like red, white, green, and gold, then attach a small loop at the top for hanging. Add a little glitter yarn or metallic thread for an extra sparkle. These stars bring warmth and charm to any holiday tree.
Another wonderful use is in garlands or banners. String multiple crochet stars together using a long chain or piece of yarn, then hang them across a mantel, window, or doorway. They’re perfect for seasonal decorations or everyday décor, depending on your color scheme.
If you’re into wearable crafts, consider turning small crochet stars into earrings, brooches, or keychains. These little accessories make unique handmade gifts and can showcase your creativity in everyday life.
You can also add crochet stars to blankets, pillows, or bags as appliqués. Sew or glue them onto existing fabric projects to give them a fun, textured look. For baby items, pastel-colored stars make adorable decorations for nursery blankets or wall hangings.
Lastly, coasters and table mats shaped like stars are another delightful option. Use thicker yarn and a larger hook to create a sturdy surface. These handmade pieces can bring a touch of charm to your dining table while protecting it from heat and moisture.
In each of these applications, the crochet star pattern adds a handmade touch that feels personal and cozy. The best part? Once you’ve learned one pattern, you can easily adapt it for dozens of creative uses.
Step-by-Step Tips for Making the Perfect Crochet Star
Creating a flawless crochet star pattern is easier than it looks, as long as you follow a few simple tips and techniques. These steps will help you get consistent results and beautiful, symmetrical stars every time.
Start with a magic ring. This technique allows you to pull the center of your star tight, eliminating gaps and giving your piece a neat finish. Chain two or three stitches (depending on the pattern), then work several double or treble crochet stitches into the ring.
After closing the ring, you’ll move on to forming the points. Each point usually starts with a combination of chains and crochet stitches worked in the same or adjacent stitches. Be sure to count carefully — even a small mistake can cause your star to look uneven.
Keep an eye on your tension. If your stitches are too loose, the star may not hold its shape. If they’re too tight, the edges may curl. A consistent, relaxed tension will give you the best results.
As you complete each round, use a stitch marker to keep track of where the round begins and ends. This is especially helpful if your pattern has several rounds with increases or chain spaces.
When finishing, weave in your ends securely using a tapestry needle. If you plan to hang or attach the star, leave a longer tail to create a loop or to sew it onto another surface.
Finally, don’t skip blocking. Even experienced crocheters find that blocking makes a huge difference. It evens out stitches, defines the points, and helps your crochet star pattern look professional.
Customizing and Personalizing Your Crochet Stars
Once you’re comfortable with the basics, it’s time to add your own touch to your crochet star pattern. Customization is what makes handmade crafts truly special and reflects your creativity.
One of the easiest ways to personalize your stars is by color choice. Traditional gold, silver, and white stars are classic, but experimenting with vibrant hues like turquoise, pink, or lavender can give a modern twist. Multicolored yarns or gradient skeins can also create stunning effects.
You can also play with yarn texture. Try cotton for crisp and lightweight stars, wool for a warm and rustic look, or metallic thread for an elegant shimmer. Mixing two yarns together can add depth and sparkle to your design.
For a three-dimensional effect, consider making layered stars. Crochet two stars and stitch them together, slightly offsetting their points. You can fill the inside with a bit of stuffing to make soft ornaments or small toys.
Another fun idea is to embellish your stars with beads, buttons, or embroidery. Adding small decorative elements at the center or tips of each star enhances their charm and uniqueness.
If you enjoy experimenting with shapes, try adjusting the number of points or the stitch height to create new versions of the star. A seven-point star, for instance, has a magical, celestial feel that can look beautiful in bohemian-style décor.
Finally, remember that crochet is about joy and creativity. The crochet star pattern is your canvas — a way to express your style, skill, and imagination through yarn and hook.
Frequently Asked Questions
1. What materials do I need to make a crochet star pattern?
You’ll need yarn (cotton or acrylic is ideal), a crochet hook suited to your yarn weight, scissors, a tapestry needle for weaving ends, and optional embellishments like beads or buttons.
2. Can beginners make a crochet star pattern?
Yes! Many crochet star patterns are beginner-friendly. Start with a simple five-point star pattern using basic stitches like single crochet and double crochet.
3. How do I make my crochet star stiff enough for ornaments?
You can stiffen your crochet stars using fabric starch, diluted glue, or a sugar-water solution. Apply the mixture, shape your star, and let it dry flat.
4. What’s the best yarn for crochet stars?
Lightweight cotton yarn works best for crisp shapes, while acrylic yarns provide flexibility. Metallic yarns are perfect for decorative or festive stars.
5. Can I use a crochet star pattern for larger projects?
Absolutely! You can join multiple stars together to make blankets, table runners, wall hangings, or scarves. The possibilities are endless.
6. How long does it take to make one crochet star?
Depending on the size and complexity, it can take anywhere from 15 minutes to an hour to complete a star.
7. Do crochet stars make good gifts?
Yes! Handmade crochet stars are thoughtful gifts that can be used as ornaments, accessories, or even bookmarks. They’re perfect for any occasion.
Making a crochet star pattern is a rewarding and creative project that blends simplicity with artistic expression. From small decorations to large compositions, crochet stars can brighten any space or gift with their handcrafted charm. You’ve learned the basics, creative ideas, and helpful techniques to make your stars beautiful and unique.
Now it’s your turn to pick up your hook and try it yourself! Did this guide help you understand the crochet star pattern better? Share your thoughts, experiences, and suggestions — your feedback helps inspire others in the crochet community to create and enjoy their own star-filled projects.