
The Stepping Stones Quilt Block Tutorial is a timeless guide for quilting enthusiasts who love combining tradition with creativity. Whether you’re new to quilting or have been sewing for years, this block design is a wonderful choice to experiment with colors, fabrics, and geometric balance. The Stepping Stones quilt block is not only beautiful but also symbolic—it represents life’s journey, one step at a time, making it a deeply meaningful project for crafters.
This tutorial will walk you through everything you need to know, from fabric selection to cutting and assembly. We’ll also explore layout variations, helpful tips, and ways to make your Stepping Stones quilt block stand out as a centerpiece in your quilt. By the end of this guide, you’ll feel confident creating your own stepping stones masterpiece and perhaps even designing an entire quilt made up of these versatile blocks.
Before diving into the details, it’s important to understand what makes the Stepping Stones Quilt Block so special. Unlike overly complex blocks, this pattern combines simplicity and structure. The geometric layout features squares and rectangles that, when pieced together, form a path-like design reminiscent of stepping stones across a garden. Its versatility allows endless creativity—you can use it in bed quilts, wall hangings, or table runners.
Understanding the Stepping Stones Quilt Block Design
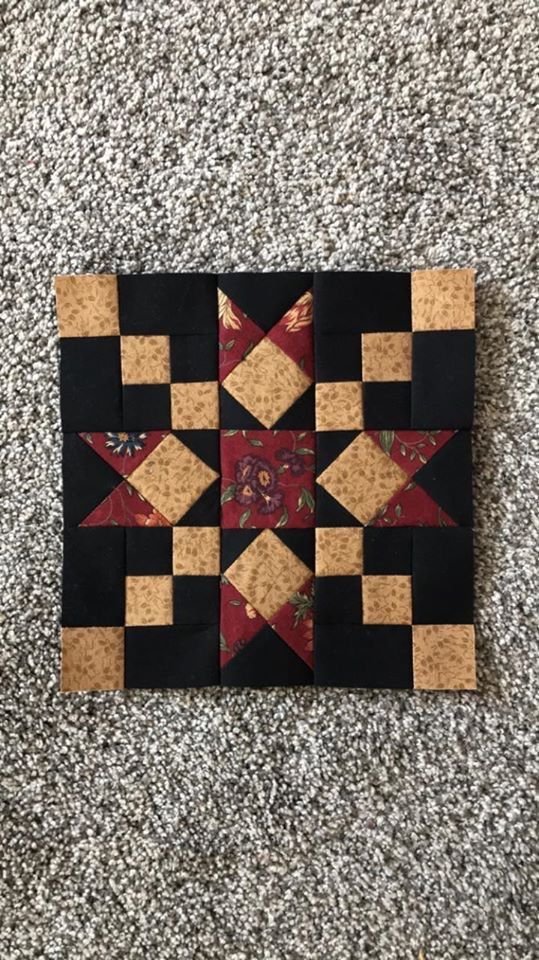
The Stepping Stones Quilt Block design is made of repeated square units, each creating a connected pathway effect. Typically, it uses contrasting fabrics—one dark and one light—to emphasize the “stone” pattern and the space between them. This design provides the illusion of depth and movement, perfect for anyone who enjoys visual storytelling through fabric.
First, let’s talk about the block layout. It usually consists of four-patch or nine-patch formations with alternating light and dark squares. The “stones” appear where darker fabrics meet, forming a diagonal pathway across the quilt. By alternating your colors strategically, you can achieve a sense of flow and rhythm throughout the quilt top.
Second, this pattern is great for scrap quilting. If you have leftover fabric pieces from previous projects, the Stepping Stones Quilt Block is an ideal way to use them up efficiently. Mixing prints, solids, and textures gives your quilt a vibrant and personalized look while keeping waste minimal.
Third, the block size is highly customizable. You can make small 6-inch blocks for intricate designs or large 12-inch ones for a bold, modern appearance. The key is maintaining consistent seam allowances—usually ¼ inch—to ensure all blocks fit together perfectly.
Fourth, one of the design’s best features is its adaptability. You can make the stones appear larger or smaller depending on your fabric placement. Some quilters even add sashing between the blocks to highlight each “path” individually. This flexibility makes it suitable for both traditional and contemporary quilt styles.
Fifth, the Stepping Stones Quilt Block serves as a fantastic beginner project. It teaches essential quilting skills like accurate cutting, seam alignment, and pressing. Yet, even experienced quilters find joy in its endless creative possibilities, experimenting with layouts and color gradients.
Finally, when viewed from afar, the quilt reveals an intricate pattern that feels dynamic yet calming—perfect for showcasing at quilt shows or gifting to loved ones. The Stepping Stones design captures movement and balance, symbolizing progress and continuity, qualities that resonate with every crafter.
Fabric Selection and Preparation
Choosing the right fabric is crucial for making your Stepping Stones Quilt Block come alive. The color contrast defines the “pathway” effect, so you’ll want to plan your palette carefully before cutting.
Start by selecting two or more contrasting fabrics—a light background and a darker accent fabric usually work best. The high contrast creates the stepping stone illusion and helps each block stand out. Solid fabrics are excellent for clarity, while patterned fabrics can add depth and personality.
Next, consider the fabric type. Cotton quilting fabric is the most recommended option because it’s easy to cut, sew, and press. Pre-washing your fabrics before cutting is also a smart move—it prevents shrinkage and ensures colorfastness, keeping your finished quilt looking fresh after washing.
Then, focus on cutting accuracy. Use a rotary cutter, ruler, and self-healing cutting mat to measure and cut your squares precisely. Even a slight miscut can affect how the blocks line up, so take your time here. For example, if you’re making a 12-inch block, cut your smaller squares and rectangles according to the pattern’s measurements, always double-checking before sewing.
After cutting, organize your fabric pieces by color and size. Keeping your workspace tidy speeds up the assembly process and reduces confusion. Some quilters like to label their fabric stacks with sticky notes or small tags to ensure consistency throughout the project.
Before stitching, always press your fabric pieces flat. This step removes wrinkles and helps achieve accurate seams later. A well-pressed block looks crisp and professional, enhancing the overall quilt’s appearance.
Lastly, remember that fabric preparation sets the foundation for your quilt. Even though it might seem tedious, taking these steps ensures your Stepping Stones Quilt Block turns out beautiful, symmetrical, and durable enough to last for years.
Assembling the Stepping Stones Quilt Block
Now that your fabric is ready, it’s time to start assembling the Stepping Stones Quilt Block. This process involves careful piecing, sewing, and pressing to bring the design together flawlessly.
Begin by laying out your fabric pieces on a flat surface according to your chosen layout. The arrangement is crucial because it determines how the stepping stones will flow across your quilt. Take a photo of your layout for reference in case pieces shift during sewing.
Next, sew your smaller square units together first. Use a consistent ¼-inch seam allowance throughout the project. This ensures uniformity and makes it easier to align all pieces later. Chain piecing—sewing multiple units in a continuous line—can save time and thread while maintaining accuracy.
After sewing the smaller units, press the seams toward the darker fabric. This reduces bulk and prevents shadowing through lighter areas. A well-pressed seam also helps your block lay flat, giving it a polished, professional appearance.
Once your smaller units are complete, begin joining them into larger sections. Double-check alignment as you go—each seam should meet neatly at intersections. If any seams are slightly off, it’s worth resewing them to achieve perfect points and straight lines.
When your entire block is assembled, give it one final press. This step sets the seams and enhances the geometric crispness of your Stepping Stones Quilt Block. Some quilters like to spray a little starch for extra firmness, especially if they plan to join many blocks into a larger quilt.
Finally, square up your finished block using a rotary cutter and ruler. Trimming ensures all blocks are the same size, which will make the final quilt top assembly smooth and frustration-free. Your first block is complete—repeat the process for as many blocks as your quilt requires!
Creative Variations and Finishing Ideas
One of the best parts of the Stepping Stones Quilt Block Tutorial is its flexibility for creativity. You can personalize your design to reflect your taste, room decor, or gifting purpose.
To start, play with color placement. Try a monochromatic palette for a sleek modern look, or use a rainbow gradient to make each block unique. You can even alternate light and dark fabrics diagonally for a dynamic, eye-catching pattern.
Another variation is to incorporate patterned fabrics—florals, plaids, or geometrics—to add texture and visual interest. Just make sure your chosen prints don’t overpower the stepping stone effect; balance is key.
You can also experiment with block size and layout. Large blocks make assembly faster and give a bold look, while smaller blocks create intricate designs. Arranging the blocks in alternating directions can produce zigzag or diamond effects, offering a modern twist to this traditional pattern.
If you’re making a full quilt, consider adding sashing or borders between the blocks. Sashing can help define each stepping stone path, and borders frame your quilt beautifully, giving it a finished, cohesive appearance.
To finish your project, select a coordinating backing fabric and quilt batting. Once layered, you can hand quilt or machine quilt following the stepping stone lines. A simple straight-line quilting pattern enhances the geometric design, while free-motion quilting adds artistry.
Finally, don’t forget the binding. A contrasting binding frames your quilt and provides durability. Whether you choose hand or machine binding, it’s the last detail that ties the whole design together—literally and visually.
Stepping Stones Quilt Block Tutorial
1. What size should I cut the pieces for a Stepping Stones Quilt Block?
The size depends on your final block size. For a 12-inch block, most quilters cut 3½-inch squares and rectangles proportionally. Always include a ¼-inch seam allowance.
2. Can beginners make the Stepping Stones Quilt Block?
Absolutely! It’s a great pattern for beginners because it uses simple shapes and straight seams. It also helps develop essential quilting techniques like cutting accuracy and seam matching.
3. What fabrics work best for this design?
100% cotton quilting fabric is ideal. Choose high-contrast colors to make the stepping stone pattern pop and ensure your quilt has a clear, defined design.
4. How can I make my quilt look more modern?
Try using solid fabrics in bold, minimalist colors, or alternate the direction of your blocks for a fresh, contemporary layout.
5. Is this block suitable for scrap quilting?
Yes! The Stepping Stones Quilt Block is perfect for using up leftover fabric. The varied prints and colors add a unique, artistic touch to your project.
6. How many blocks do I need for a full-size quilt?
That depends on your block size and quilt dimensions. For a standard 60”x80” quilt, you’ll need approximately 30 twelve-inch blocks.
7. Can I hand-sew the blocks instead of using a machine?
Yes, hand-sewing is possible—it just takes more time. Use small, even stitches and press seams carefully to maintain accuracy.
Creating your own Stepping Stones Quilt Block is a rewarding experience that combines artistry, precision, and personal expression. Throughout this tutorial, you’ve learned how to choose fabrics, cut accurately, assemble the block, and even explore creative variations to make it uniquely yours.
Whether you make a single block for practice or an entire quilt filled with stepping stones, the process reflects patience, growth, and craftsmanship—just like the name suggests.
We hope this Stepping Stones Quilt Block Tutorial inspired you to start your next quilting journey. Share your honest opinion and suggestions below—your feedback helps improve future tutorials and keeps the quilting community thriving!
