
Whimsical Amigurumi Butterflies – crochet pattern projects are a joyful way to combine creativity, color, and craftsmanship into one charming design. These little handmade butterflies are perfect for adding a touch of magic to your home décor, gifting to friends, or even creating as part of a themed collection. Crochet enthusiasts of all skill levels can enjoy the process of bringing these delicate yet playful creatures to life, using just a hook, yarn, and imagination.
Crocheting amigurumi butterflies allows crafters to explore vibrant color palettes and delicate details without overwhelming complexity. The patterns often include simple stitches, making them accessible for beginners while still offering opportunities for advanced crocheters to add unique embellishments. The whimsical style encourages personal touches such as embroidery, beads, or gradient yarn blends, ensuring that no two butterflies are ever quite the same.
With Whimsical Amigurumi Butterflies – crochet pattern, you can create a piece that tells a story. Whether you imagine your butterfly as a garden visitor, a symbol of transformation, or simply a burst of cheerful color, each creation reflects your personal style. The joy comes not just from the finished butterfly, but from the meditative rhythm of crocheting, the satisfaction of mastering techniques, and the delight of seeing your vision take shape stitch by stitch.
Choosing the Perfect Yarn and Tools
When starting a Whimsical Amigurumi Butterflies – crochet pattern, the choice of yarn can make a big difference in the final look. Soft cotton yarn is a popular choice for amigurumi because it holds stitches well, giving the butterfly a neat and defined appearance. On the other hand, acrylic yarn offers a broader range of colors and is often more affordable, making it ideal for experimenting with different designs.
Yarn weight is equally important. Lighter weights produce smaller, more delicate butterflies, while heavier yarns can create a bold, plush effect. For whimsical projects, many crafters prefer sport weight or DK weight yarn, as these balance detail with durability. Whichever you choose, ensure that your hook size matches the yarn to keep the stitches tight and prevent stuffing from showing through.
Hook choice depends on both yarn and personal comfort. Many crocheters use a slightly smaller hook than the yarn label suggests to achieve tighter stitches, which is especially helpful for amigurumi. Comfortable, ergonomic hooks are worth the investment for longer projects, reducing hand strain and making the process more enjoyable.
In addition to yarn and hooks, you’ll need stuffing material to give your butterfly its shape. Polyester fiberfill is the most common choice, as it’s lightweight and washable. Safety eyes or embroidered features can bring personality to your butterfly’s face, and a yarn needle is essential for sewing the parts together securely.
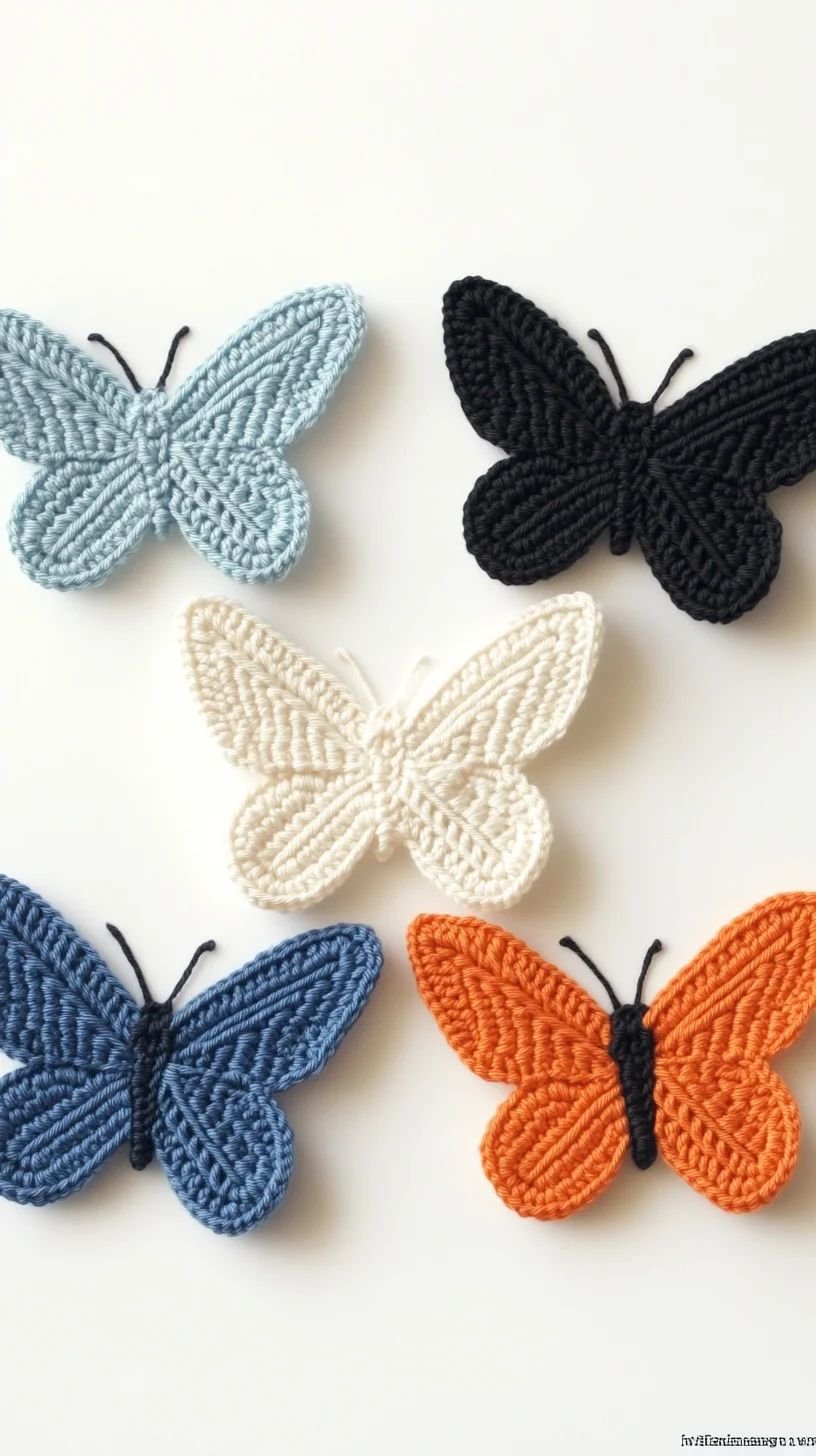
The whimsical nature of these butterflies means you can experiment freely with colors. From pastel pinks and blues to bold rainbow gradients, the choice is yours. This freedom makes the pattern an excellent stash-buster, allowing you to use leftover yarn in creative ways.
Finally, keep a pair of small, sharp scissors on hand for neat trimming. Clean cuts help prevent yarn fraying and keep your finished project looking professional. The right tools will make the process smooth and enjoyable from start to finish.
Step-by-Step Guide to Crocheting the Body
The body of the butterfly is the foundation of any Whimsical Amigurumi Butterflies – crochet pattern. Most patterns begin with a magic ring, which allows you to create a tight, closed starting point without gaps. This is followed by rounds of single crochet stitches, gradually shaping the body from head to tail.
Tension control is key. Too loose, and your stuffing may peek through; too tight, and your hands may tire quickly. Practice until you find a comfortable rhythm that produces even stitches. Counting each stitch is essential to keeping your work symmetrical, so use a stitch marker to track the beginning of each round.
Once the head is formed, you can insert the safety eyes or embroider them before continuing. This step is easier to do before the body is fully stuffed and closed. Adding a tiny smile or blush with yarn or embroidery floss can make your butterfly look extra friendly and whimsical.
The body usually tapers slightly toward the end, giving it a realistic shape. Some patterns include small color changes along the body to mimic natural markings, while others keep it simple for a more playful look. Either approach works beautifully, depending on your vision.
Stuff the body firmly but not overly tight, as too much stuffing can stretch the stitches. Distribute the filling evenly to maintain shape and stability. Closing the body with neat, secure stitches will ensure durability, especially if your butterfly will be handled frequently.
At this stage, you’ll have a solid base to which the wings and other decorative elements can be attached. A well-made body sets the tone for the rest of your project, giving you a sturdy and balanced foundation.
Creating Whimsical Wings with Personality
The wings are where the Whimsical Amigurumi Butterflies – crochet pattern truly comes to life. They provide the opportunity to showcase vibrant colors, textures, and patterns. Most designs feature two pairs of wings: the larger upper wings and the smaller lower wings.
To make the wings stand out, consider using a combination of colors in stripes, gradients, or even variegated yarns. Whimsical styles embrace creative freedom, so don’t hesitate to experiment with unexpected color pairings or embellishments like beads and embroidery.
The upper wings are usually more elongated and may include gentle curves or scalloped edges. Crocheting with slightly looser tension can give them a soft, flowing look. Blocking the wings after finishing can also help them hold their shape, especially if you want them to appear open and airy.
Lower wings tend to be rounder or more compact, complementing the larger wings while adding balance to the butterfly’s silhouette. Matching the color palette between upper and lower wings creates harmony, but contrasting them can add a playful twist.
When attaching wings to the body, use a yarn needle and sew them firmly but neatly. Positioning them symmetrically on each side is important for visual balance. Some crafters like to slightly angle the wings upward to give the impression of flight.
Adding details such as embroidery, surface crochet, or even small appliqués can elevate the wings from simple shapes to works of art. These touches are what make each butterfly truly unique and personal.
Adding Finishing Touches and Display Ideas
The final stage of a Whimsical Amigurumi Butterflies – crochet pattern involves adding small yet impactful details. Antennae can be made from short pieces of yarn, wire, or even pipe cleaners wrapped in yarn. A little curl at the end gives them a charming, playful look.
Some crocheters like to lightly blush the cheeks with fabric paint or pastel chalk, adding warmth and personality. These details are optional but can make a big difference in the butterfly’s overall expression.
Once assembled, your butterfly can be used in countless ways. Attach a keyring to create a whimsical bag charm, or add a safety pin to make a brooch. Larger butterflies can be hung as wall décor, mobiles for a nursery, or seasonal garlands.
Gifting a handmade butterfly can be a meaningful gesture. They make lovely birthday or holiday presents, and their lighthearted design appeals to children and adults alike. Pair one with a handwritten note for a thoughtful touch.
Photographing your finished project is also part of the fun. Use natural light to highlight colors and textures, and consider styling the butterfly among flowers or garden props for an enchanting scene.
Finally, remember that each butterfly you create is a reflection of your creativity. Whether you make one or a dozen, the process of crafting them is as rewarding as the result.
Whimsical Amigurumi Butterflies
Q: Is the Whimsical Amigurumi Butterflies – crochet pattern suitable for beginners?
A: Yes, many patterns are beginner-friendly, using basic stitches and simple shapes. Clear instructions and practice make it accessible to new crocheters.
Q: What type of yarn works best for amigurumi butterflies?
A: Cotton yarn is ideal for defined stitches, while acrylic offers a wide range of colors. Choose based on your desired texture and appearance.
Q: How long does it take to make one butterfly?
A: Depending on your skill level and the pattern’s complexity, it can take anywhere from 2 to 6 hours to complete a butterfly.
Q: Can I wash my amigurumi butterfly?
A: Yes, if made with washable yarn and stuffing. Hand washing is recommended to preserve shape and details.
Q: How can I customize the pattern?
A: Experiment with colors, add embroidery or beads, and adjust wing shapes to make each butterfly unique.
Q: Do I need special tools?
A: Aside from standard crochet tools like hooks, yarn needles, and scissors, you may want safety eyes or stuffing material for a polished finish.
Creating Whimsical Amigurumi Butterflies – crochet pattern projects is a delightful journey into the world of handmade art. From choosing the perfect yarn to adding whimsical wing designs, each step offers room for creativity and personal expression. The result is a charming piece that can brighten any space, serve as a heartfelt gift, or simply bring joy to the maker.
If you’ve ever tried making your own amigurumi butterflies—or if this article inspired you to start—share your thoughts and experiences. Your honest opinion and suggestions can help others in their crafting journey and inspire new designs for everyone to enjoy.