
How to Make a Stonehenge Block Quilt is a creative and fulfilling sewing project that combines geometric precision with timeless fabric artistry. This style of quilt, inspired by the iconic monument Stonehenge, often features symmetrical blocks, earthy color palettes, and bold designs that give a sense of both structure and elegance. Whether you are a beginner looking for a manageable first project or an experienced quilter aiming to add a unique pattern to your collection, the Stonehenge Block Quilt offers endless possibilities for customization and personal expression.
Creating this quilt involves more than just cutting and sewing fabric; it is about balancing design, color harmony, and construction techniques. By following a step-by-step approach, you can ensure that your quilt is not only beautiful but also durable and long-lasting. In this guide, we will walk through the materials you need, the process of preparing your fabric, how to assemble your blocks, and tips for finishing your project to perfection.
The name “Stonehenge Block” often suggests symmetry and strength, much like the famous ancient structure. This makes it a great choice for quilters who enjoy working with structured patterns and want a quilt that will stand out in any room. With the right planning and attention to detail, you can create a piece that looks professional and holds sentimental value for years to come.
Gathering Your Materials for a Stonehenge Block Quilt
Before you start learning how to make a Stonehenge Block Quilt, you need to gather the right tools and materials. This step is essential for ensuring your project goes smoothly and without unnecessary interruptions.
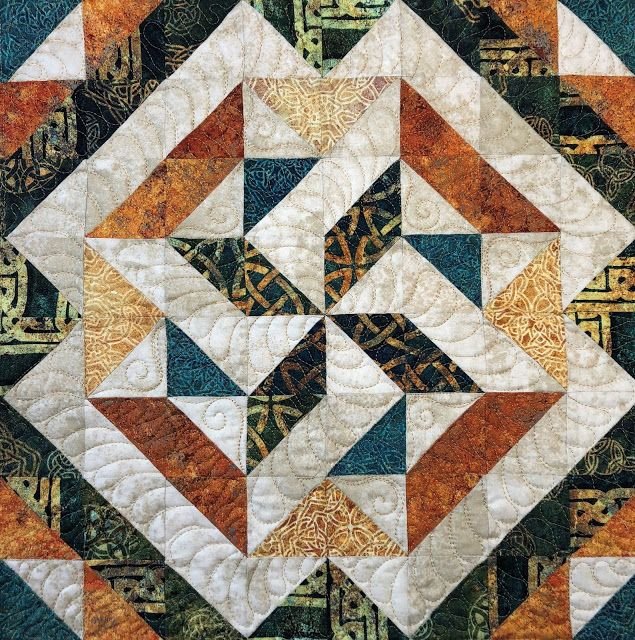
First, select your fabric. A Stonehenge Block Quilt works beautifully with earthy tones, neutral shades, or a mix of deep blues, browns, and grays to mimic the natural stone look. High-quality cotton fabrics are ideal, as they are easy to cut, sew, and press.
Next, choose batting, which will provide warmth and structure to your quilt. Cotton or cotton-blend batting is a reliable choice for most quilting projects. Consider the thickness depending on the quilt’s intended use—thicker for winter warmth, thinner for a decorative throw.
You will also need a rotary cutter, cutting mat, and quilting ruler for accurate cuts. Accuracy is crucial in a block pattern like this, as even small discrepancies can affect the overall symmetry.
Don’t forget your thread. Choose a durable, high-quality thread in a color that blends well with your fabrics. Polyester or cotton threads work well for quilting.
Lastly, have pins or clips, a sewing machine with a quilting foot, and an iron ready. Pressing is an often overlooked but essential step in quilting, ensuring seams are crisp and blocks lay flat.
By gathering everything beforehand, you can work more efficiently and maintain focus on creating a quilt you will be proud of.
Cutting and Preparing Your Quilt Pieces
The next step in how to make a Stonehenge Block Quilt is cutting and preparing your fabric pieces. Precision at this stage is key to achieving a neat, professional-looking quilt.
Begin by washing and ironing your fabric. Pre-washing prevents shrinkage after the quilt is finished, and ironing smooths out wrinkles for accurate cutting.
Use your rotary cutter and quilting ruler to cut the fabric into the required block sizes. The Stonehenge block pattern typically involves squares and rectangles that fit together in a symmetrical layout.
Be consistent with your measurements. Even a fraction of an inch off can lead to mismatched seams later on. To maintain accuracy, double-check each cut before moving on.
Once all pieces are cut, organize them by color and size. This will help you assemble the blocks more efficiently and avoid confusion.
If you are adding a border or sashing, cut these pieces at this stage as well. They can enhance the design and frame your Stonehenge blocks beautifully.
Taking your time in the preparation stage pays off later, making sewing smoother and reducing the need for adjustments.
Assembling the Stonehenge Quilt Blocks
Now that your pieces are ready, it’s time to assemble your blocks, a key step in how to make a Stonehenge Block Quilt. This is where your fabric choices and precise cuts come together.
Start by arranging your fabric pieces on a flat surface or design wall. Play with the arrangement until you are satisfied with the balance of colors and patterns.
Sew smaller pieces together first to form larger sections of each block. Always press seams open or to one side after sewing to keep the block flat.
Use a consistent seam allowance—most quilts use a 1/4-inch allowance. Consistency here is vital for blocks to align perfectly.
Once each block is complete, check the measurements. They should all be exactly the same size to ensure smooth assembly in the next step.
If any block is slightly off, trim carefully, but avoid cutting too much as it can distort the pattern.
Repeat this process for all blocks until you have the total number needed for your quilt’s size.
Joining the Blocks and Finishing the Quilt
The final phase in how to make a Stonehenge Block Quilt is joining your blocks, adding the batting and backing, and finishing your quilt with binding.
Lay out all your blocks to determine the best arrangement. You may want to rotate some blocks for a balanced design.
Sew the blocks together in rows, then join the rows. Press each seam after sewing for a flat finish.
Once the quilt top is assembled, prepare your quilt sandwich: place the backing fabric right side down, lay the batting on top, and then place your quilt top right side up. Smooth out any wrinkles.
Baste the layers together using pins or spray adhesive to keep them from shifting while quilting.
Quilt as desired. You can stitch in the ditch along the seams for a clean look or use free-motion quilting for a more decorative touch.
Finally, trim the edges and attach the binding. This frames your quilt and secures the raw edges, giving it a polished, professional finish.
How to Make a Stonehenge Block Quilt
Q: What size should my blocks be for a Stonehenge Block Quilt?
A: The size depends on your desired quilt dimensions, but many quilters use 12-inch blocks for a balanced look.
Q: Can I make this quilt by hand instead of using a sewing machine?
A: Yes, it’s possible, but it will take much longer. A sewing machine speeds up the process and provides consistent stitches.
Q: What fabrics work best for a Stonehenge Block Quilt?
A: 100% cotton fabrics in earthy or natural tones work beautifully, but you can experiment with other colors for a modern twist.
Q: Do I need to pre-wash my fabric?
A: Pre-washing is recommended to prevent shrinkage and remove any chemicals from the manufacturing process.
Q: How can I make sure my blocks align perfectly?
A: Accurate cutting, a consistent seam allowance, and careful pressing are the keys to perfect alignment.
Q: Is the Stonehenge Block Quilt suitable for beginners?
A: Yes, the block design is straightforward, making it a great project for beginners who want to practice precision.
Learning how to make a Stonehenge Block Quilt can be a deeply rewarding experience, blending creativity with craftsmanship. From choosing the perfect fabrics to piecing together precise blocks and finishing with professional binding, each step offers an opportunity to create something truly unique.
With patience and attention to detail, you can produce a quilt that reflects both your skill and personal style. I’d love to hear your honest opinion about this guide and any suggestions you have for making it even more helpful—share your thoughts and ideas!