
How to Make a Temperature Quilt {video tutorial} is one of the most searched topics among quilting enthusiasts today. Whether you’re a beginner or an experienced quilter, creating a temperature quilt is both a meaningful and visually stunning project that tells the story of an entire year through fabric and color. In this article, we’ll walk you through every step of this creative journey, and yes — there’s a video tutorial to help guide you along the way.
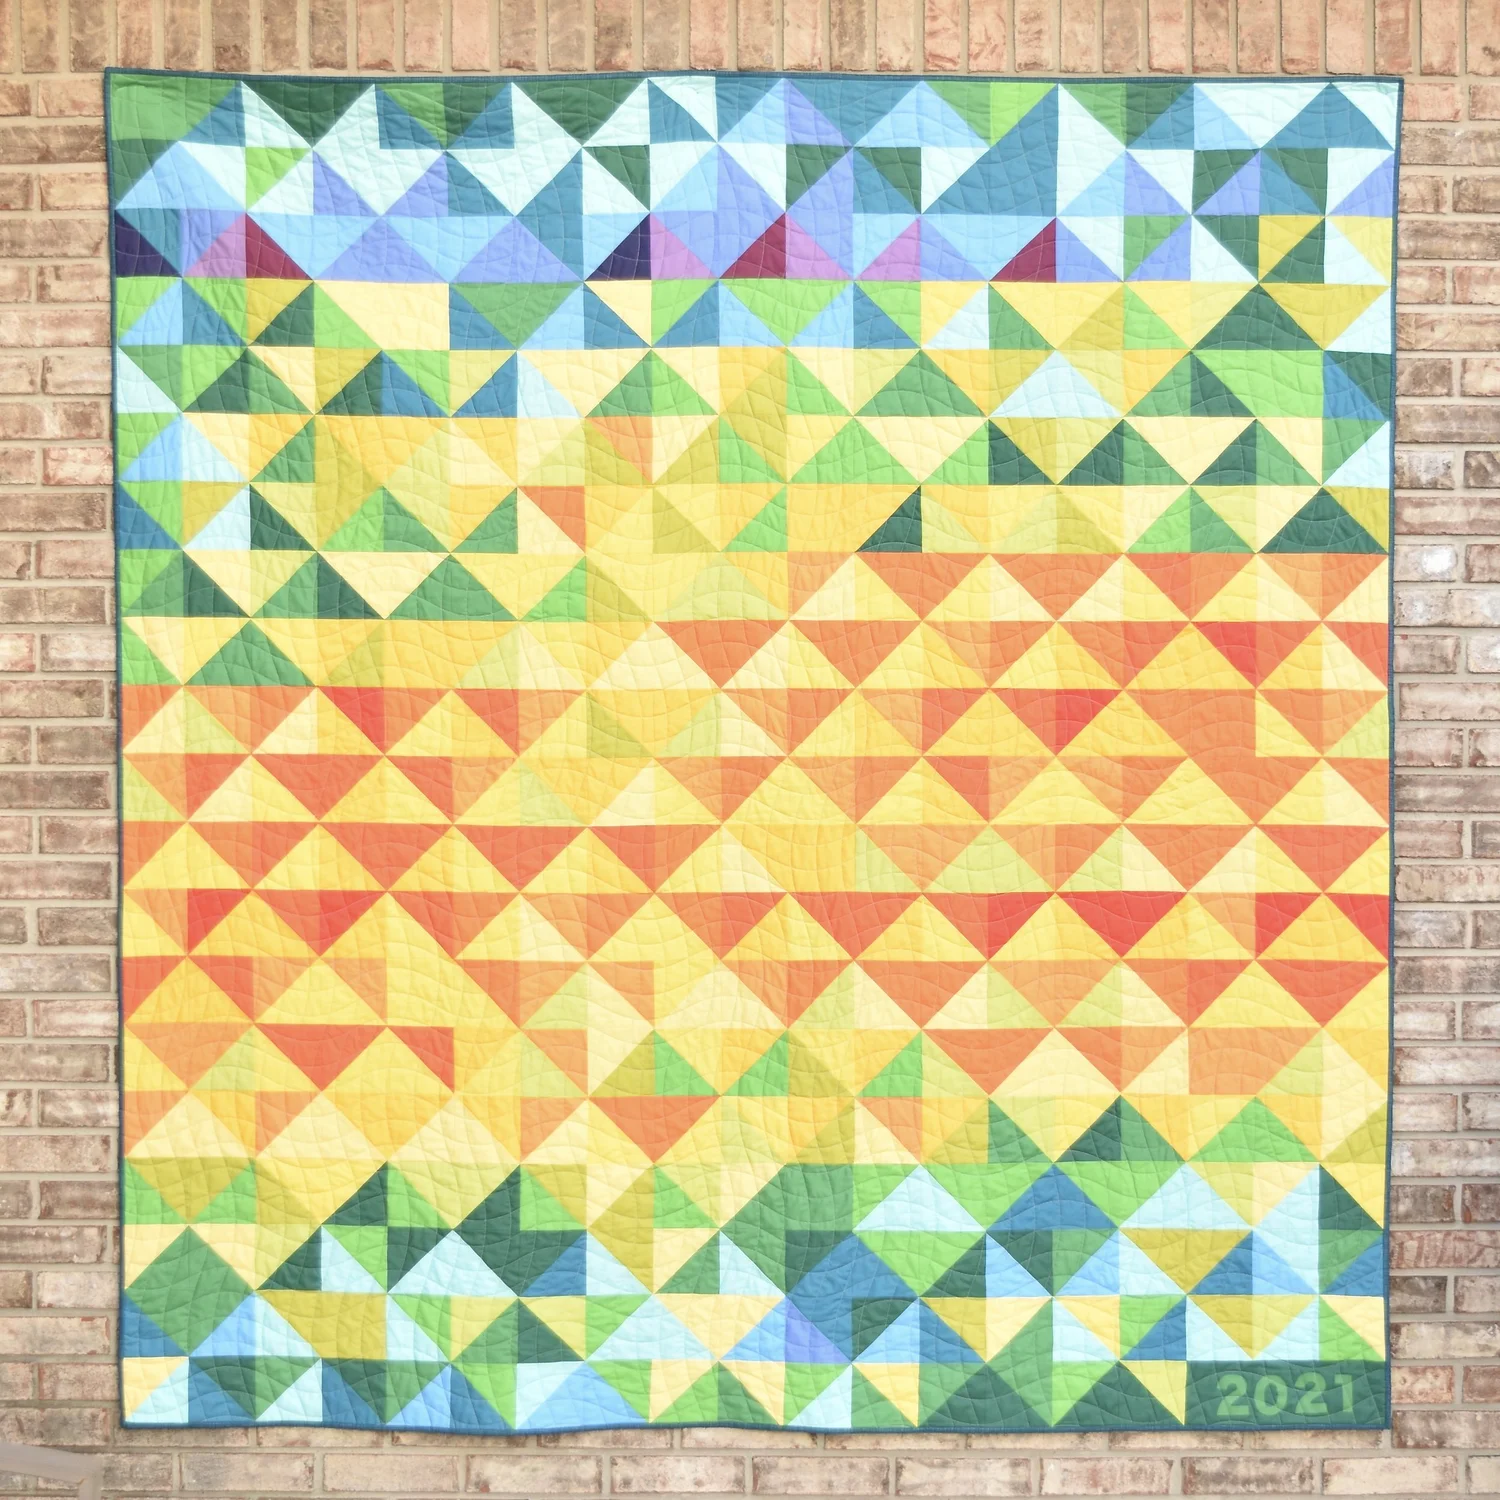
A temperature quilt is more than just a cozy blanket. It’s a visual representation of daily temperatures in your location over a year. Each day is marked by a color-coded fabric strip corresponding to the high (or sometimes low) temperature of the day. By the end of the year, you have a quilt that represents all 365 days — a vibrant tapestry of time and climate.
Using a video tutorial is one of the most effective ways to learn how to make a temperature quilt. Watching the process in real-time allows you to grasp techniques, visualize measurements, and avoid common beginner mistakes. This makes your project smoother and more enjoyable from the start. Now, let’s dive into the steps involved in making your very own temperature quilt.
Choosing Your Materials for a Temperature Quilt
Before you start sewing, it’s essential to gather all the necessary supplies. The right materials can make or break your quilting experience. Since this project spans an entire year, choosing high-quality and consistent fabric is key.
First, select your fabric color palette. This will represent different temperature ranges. Most quilters choose a rainbow spectrum — blues for cold, greens for mild, and reds or oranges for warm days. You’ll want to assign a specific temperature range (e.g., every 5°F or 2°C) to each color.
Second, you’ll need temperature data. Decide whether you’ll use the high, low, or average daily temperature. Many quilters use a local weather app or journal it daily. If you’re starting mid-year, you can retrieve historical weather data from reliable sources.
Next, gather basic quilting supplies. These include a rotary cutter, cutting mat, quilting ruler, sewing machine, neutral thread, batting, backing fabric, and binding. Make sure everything you buy is durable — your quilt will be handled often and should last for years.
Don’t forget a planner or spreadsheet. This helps you track your progress daily or weekly. It’s easy to fall behind, especially with a year-long project, so staying organized is essential.
Use pre-cut fabric strips if you’re short on time. Many fabric stores sell pre-cut jelly rolls in gradient colors, which can be perfect for temperature quilts. Just be sure the colors match your selected temperature key.
Lastly, prepare your video tutorial for reference. Save it on your device or bookmark it so you can rewatch sections as needed. A good tutorial will cover both technical steps and creative suggestions for layout and stitching.
Creating Your Temperature Key
One of the most important aspects of learning how to make a temperature quilt {video tutorial} is designing your temperature key. This is the system that links each temperature range to a specific color — and it will guide your entire project.
Start by determining the temperature range you want to track. In most locations, daily highs vary between 30°F and 100°F (or 0°C to 40°C). Break this range into smaller increments — such as every 5 degrees — to ensure a more detailed and colorful result.
Choose colors that are visually distinct from each other. This helps make temperature shifts more apparent in your finished quilt. Avoid shades that are too close in hue, as they may blend together and lose the visual impact.
Print out or draw your temperature chart and keep it near your sewing station. Some people even laminate it! Consistency is key, and this chart ensures you always use the correct color for each day.
Make sure your chart corresponds with the fabric you’ve chosen. Label your fabric strips with temperature tags to avoid confusion. Many quilters use masking tape or pin small labels to each bundle.
If you’re working from a video tutorial, pause during the temperature key explanation and replicate the chart exactly. Most good tutorials will show you how to build a color gradient step-by-step.
Once your temperature key is finalized, consider sharing it with others in a quilting group or online community. You’d be surprised how many people are inspired by color combinations and layout ideas from other quilters.
Piecing the Quilt Together
This is where your temperature quilt really starts to come to life. As the days pass, you’ll piece together your strips, row by row, watching the seasons shift in color.
Decide how you want to arrange the quilt: rows, columns, blocks, or spirals. The most traditional layout is horizontal rows — one strip per day. For a 365-day quilt, this would be around 13 rows of 28 blocks.
Sew your fabric strips daily, weekly, or monthly. Many quilters find it easier to sew once a week and update their planner as they go. This creates a nice routine without feeling like a daily chore.
Use a 1/4 inch seam allowance and press your seams flat after each addition. This keeps the quilt top tidy and prevents unwanted bulk. Consistency here really affects the final look.
Measure your quilt top periodically to ensure you’re staying on track. If you notice warping or stretching, adjust your technique. Some people use stabilizer strips for precision, especially in larger quilts.
Add creative flair if you’d like. Some quilters include symbols or embroidered details for holidays, special dates, or weather events (like snowstorms or heatwaves). These make the quilt even more personal.
Continue referring to your video tutorial throughout the piecing process. Seeing someone else perform each step — especially how they join rows or align seams — can save you time and frustration.
Finishing Touches and Display Ideas
After months of dedication, it’s time to turn your quilt top into a finished masterpiece. Don’t rush this final stage — the finishing process gives your project structure, warmth, and polish.
Layer your quilt sandwich: quilt top, batting, and backing fabric. Smooth everything out and baste it together with pins or temporary spray adhesive. Ensure the layers are aligned and wrinkle-free.
Now it’s time for quilting. You can do this by machine or by hand. Many temperature quilts use simple straight-line quilting to avoid distracting from the color pattern. Quilt diagonally, vertically, or use a free-motion design if you’re confident.
Trim the edges and bind your quilt using coordinating or neutral fabric. Binding frames the entire quilt and gives it a professional finish. Use double-fold binding for durability.
Consider adding a label to the back of your quilt. Include your name, the year, and maybe even a note explaining what the colors mean. This turns your quilt into a piece of personal history.
Decide how you’ll display your temperature quilt. Many people hang theirs on a wall, lay them across a guest bed, or fold them in a visible spot. Wherever it goes, it will be a conversation piece!
Finally, revisit your video tutorial to double-check that you’ve completed all the final steps. Some tutorials even include bonus tips for long-term care and creative storage ideas.
Frequently Asked Questions
What is a temperature quilt?
A temperature quilt is a year-long project where each day’s temperature is recorded using a colored fabric strip. The final quilt visually represents temperature trends over time.
Can I start a temperature quilt in the middle of the year?
Yes, you can begin any time! Just use past weather data to fill in earlier dates, or simply start fresh from your chosen month.
Do I need to be an experienced quilter to make one?
No. Even beginners can follow a video tutorial on how to make a temperature quilt. Just start with basic piecing skills and build your confidence over time.
How do I choose the temperature ranges and colors?
Divide your local temperature range into equal increments (e.g., every 5°F) and assign a fabric color to each. Use bright, contrasting colors for better visual impact.
How big is a typical temperature quilt?
This varies based on layout, but many are around twin size (60” x 80”) or throw size. You can scale up or down depending on how much space you have.
What if I miss a few days of sewing?
Don’t worry — just keep your data recorded in a planner or spreadsheet. You can catch up anytime, especially if you batch your sewing weekly or monthly.
Making a temperature quilt is not just a quilting project — it’s a year-long story told through fabric and creativity. This guide has shown you how to make a temperature quilt {video tutorial}, from choosing materials and designing a temperature key to sewing, quilting, and finishing. It’s a rewarding way to track time, practice consistency, and express your artistry.
If you found this article helpful, please leave a sincere opinion below. Your feedback and suggestions help improve the community and inspire more quilters to start their own temperature quilt journey!