
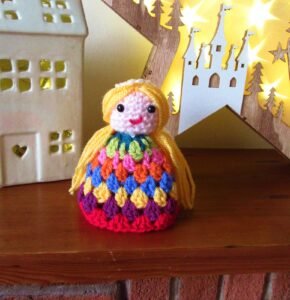
If you’re looking for a heartfelt and creative project, this Easy Crochet Angel Tutorial is the perfect way to bring warmth, charm, and a touch of serenity to your home or gift list. Whether you’re preparing Christmas decorations, giving a handmade gift, or simply enjoying a mindful crochet session, creating a delicate crochet angel is a rewarding experience. In this tutorial, we’ll explore everything you need to know to make your very own crochet angel, step-by-step, even if you’re a beginner.
The beauty of this Easy Crochet Angel Tutorial lies in its simplicity. You won’t need complicated stitches or advanced techniques—just your favorite yarn, a hook, and a few quiet hours. These crochet angels can be made in different sizes and used as ornaments, table decorations, or even keepsakes for friends and family.
Throughout this article, you’ll see the term Easy Crochet Angel Tutorial repeated to ensure clarity and focus, helping those who are searching for just the right pattern to find exactly what they need. By the end, you’ll have all the confidence to create beautiful crochet angels that bring joy and elegance wherever they go.
1. Gathering Your Materials and Tools
Before starting your angel, you’ll need to gather a few materials. The good news? Most items are probably already in your craft basket. This section of our Easy Crochet Angel Tutorial will walk you through everything you’ll need.
Choose a yarn that’s lightweight and soft. Cotton or acrylic in white, cream, or even metallic threads works well for that angelic look. The yarn weight can vary depending on your desired angel size.
Pick a hook size that suits your yarn. Most yarn labels include recommended hook sizes. For amigurumi-style angels, you might want to go down a hook size to make tighter stitches.
You’ll also need a yarn needle for weaving in ends, scissors, and optional items like stuffing for a 3D effect, beads for embellishment, or a ribbon to hang your angel.
Having a stitch marker on hand can help you track rounds or key points in the pattern, especially if you’re crocheting in a spiral.
Finally, make sure you have good lighting and a comfortable workspace. Crocheting fine details like angel wings and halos is easier when your hands are relaxed and your eyes are well-rested.
Take a moment to review your materials before beginning. A little preparation makes the Easy Crochet Angel Tutorial flow much more smoothly.
2. Starting the Body of Your Angel
The body forms the foundation of your crochet angel. In this part of the Easy Crochet Angel Tutorial, we’ll begin with the classic cone shape that defines the angel’s dress.
Start with a magic ring and make six single crochets into the ring. Pull it tight and slip stitch to join. This will be the very top of the angel’s body.
Work in rounds, gradually increasing your stitch count. For example, round two may have two single crochets in each stitch, round three might alternate one and two stitches per stitch, and so on.
As you continue increasing each round evenly, the work will naturally start to fan out, forming a cone shape.
Keep your tension consistent. Loose stitches may leave gaps, while overly tight ones can warp the shape. If needed, adjust your hook size slightly.
Continue building your cone until it’s the height you want—typically 4 to 6 inches tall for ornaments, or larger if you want a table centerpiece.
You can finish the base with a round of decorative picot stitches or scallops to give your angel’s dress a more elegant appearance.
3. Crafting the Wings and Arms
The wings are what truly bring the angel to life. This portion of the Easy Crochet Angel Tutorial explains how to make graceful wings and optional arms.
To begin the wings, chain a foundation row—around 10 to 15 chains depending on your desired width. Turn and crochet back using shell stitches or fan patterns to create feather-like textures.
You can make two identical wings separately and attach them to the back of the angel’s body using a yarn needle.
Position the wings high enough on the back to appear as though they’re lifting the angel in flight. Be sure to secure them well so they don’t shift over time.
If you want to add arms, simply crochet two short tubes or curved shapes using single crochet in the round. Stuff them lightly if you want a plumper effect.
Attach the arms to the side of the body, folding the hands together if you want the angel to appear as though it’s praying.
Embellish the wings with a bit of sparkle, using metallic thread or a touch of glitter yarn to give them a celestial shimmer.
4. Finishing Touches: Halo, Face, and Embellishments
Now for the final magical details of your Easy Crochet Angel Tutorial! This is where your angel truly becomes a one-of-a-kind treasure.
To make a halo, chain 20 to 30 stitches (depending on size), then join the ends with a slip stitch to form a ring. You can stiffen it with fabric stiffener or crochet around a wire for stability.
Sew or glue the halo gently onto the top of the angel’s head or just above it with invisible thread or matching yarn.
You can embroider simple eyes and a smile if you want your angel to have a face. Use black thread or fine yarn and a delicate hand.
Alternatively, keep the face blank for a more classic or minimalist look. Many traditional crochet angels have no facial features at all.
Add optional extras like a small crocheted harp, mini flower bouquet, or decorative buttons. Personalizing your angel is part of the fun.
Lastly, block your angel gently to shape it. You can use steam blocking or a light spray of water to help it hold its form beautifully.
FAQ – Easy Crochet Angel Tutorial
What type of yarn is best for crochet angels?
Lightweight cotton or acrylic yarn works best. Choose a color like white, cream, or pastel for a classic angelic look. Metallic yarns can add a festive touch.
Can beginners follow this Easy Crochet Angel Tutorial?
Absolutely! This tutorial is designed for all levels. With basic stitches like single crochet, increase, and decrease, even those new to crochet can succeed.
How long does it take to make a crochet angel?
Depending on the size and your speed, it can take between 1 and 4 hours. Simpler designs are quicker, while detailed embellishments add time.
Can I make this angel flat instead of 3D?
Yes. You can crochet two flat angel shapes and stitch them together or just leave them flat for appliqués or ornaments.
What size should the halo be?
The halo should be proportionate to the angel’s head. Usually, chaining 20 to 30 stitches is enough, but feel free to adjust based on your design.
Is it safe to give crochet angels as gifts to babies or small children?
If you’re making an angel for a baby, avoid small embellishments like buttons or beads that could be choking hazards. Always secure parts tightly.
This Easy Crochet Angel Tutorial offers you a beautiful way to express your creativity and share something meaningful with others. From gathering materials to crafting wings, body, and halo, you’ve learned step-by-step how to make a timeless crochet decoration or heartfelt gift.
Whether you’re creating a single angel or a full host for the holidays, these handmade treasures will carry your love and talent. Take your time, personalize your project, and most importantly—enjoy the process.
We would love to hear your thoughts! If you tried this Easy Crochet Angel Tutorial, please leave a sincere comment or share your suggestions. Your feedback helps improve future tutorials and connects our growing community of crafters.